
Bob Marshall Wilderness Chinese Wall Circuit
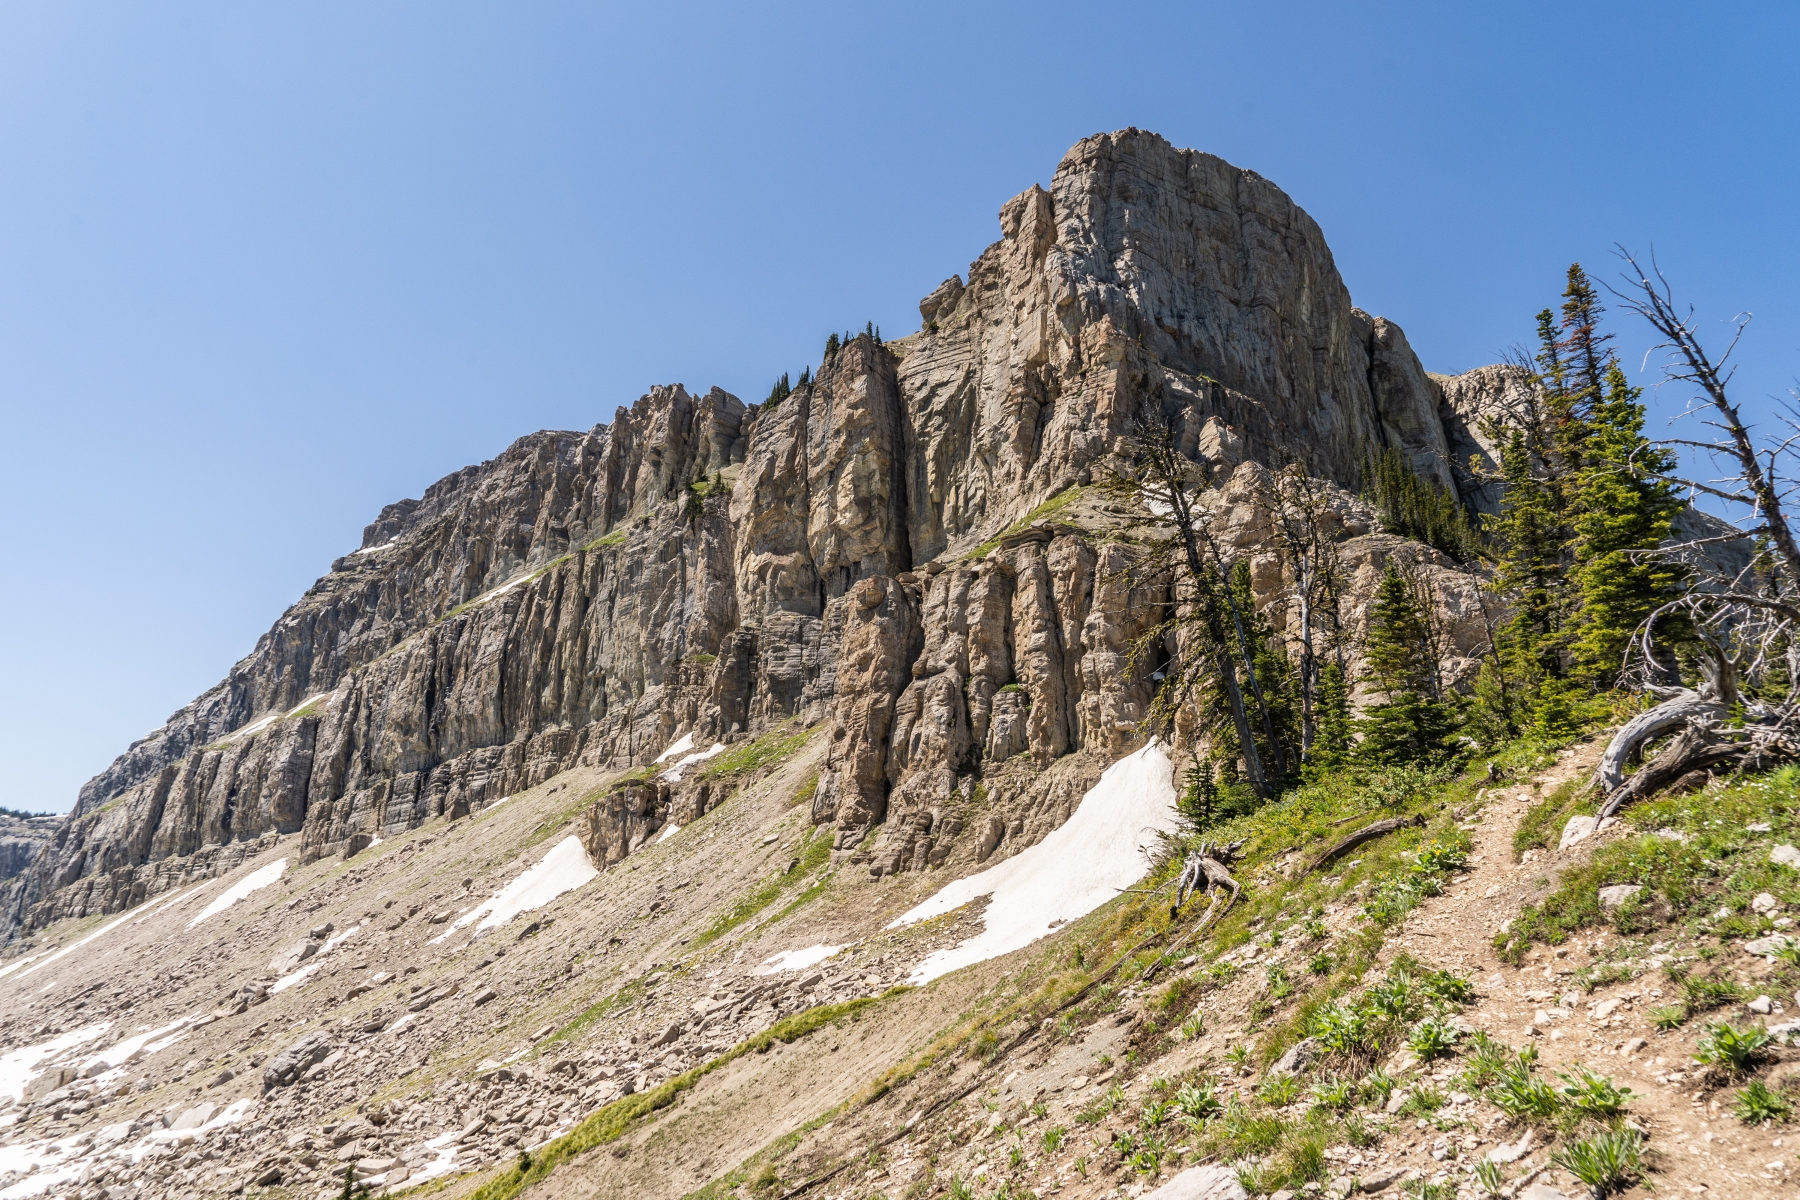
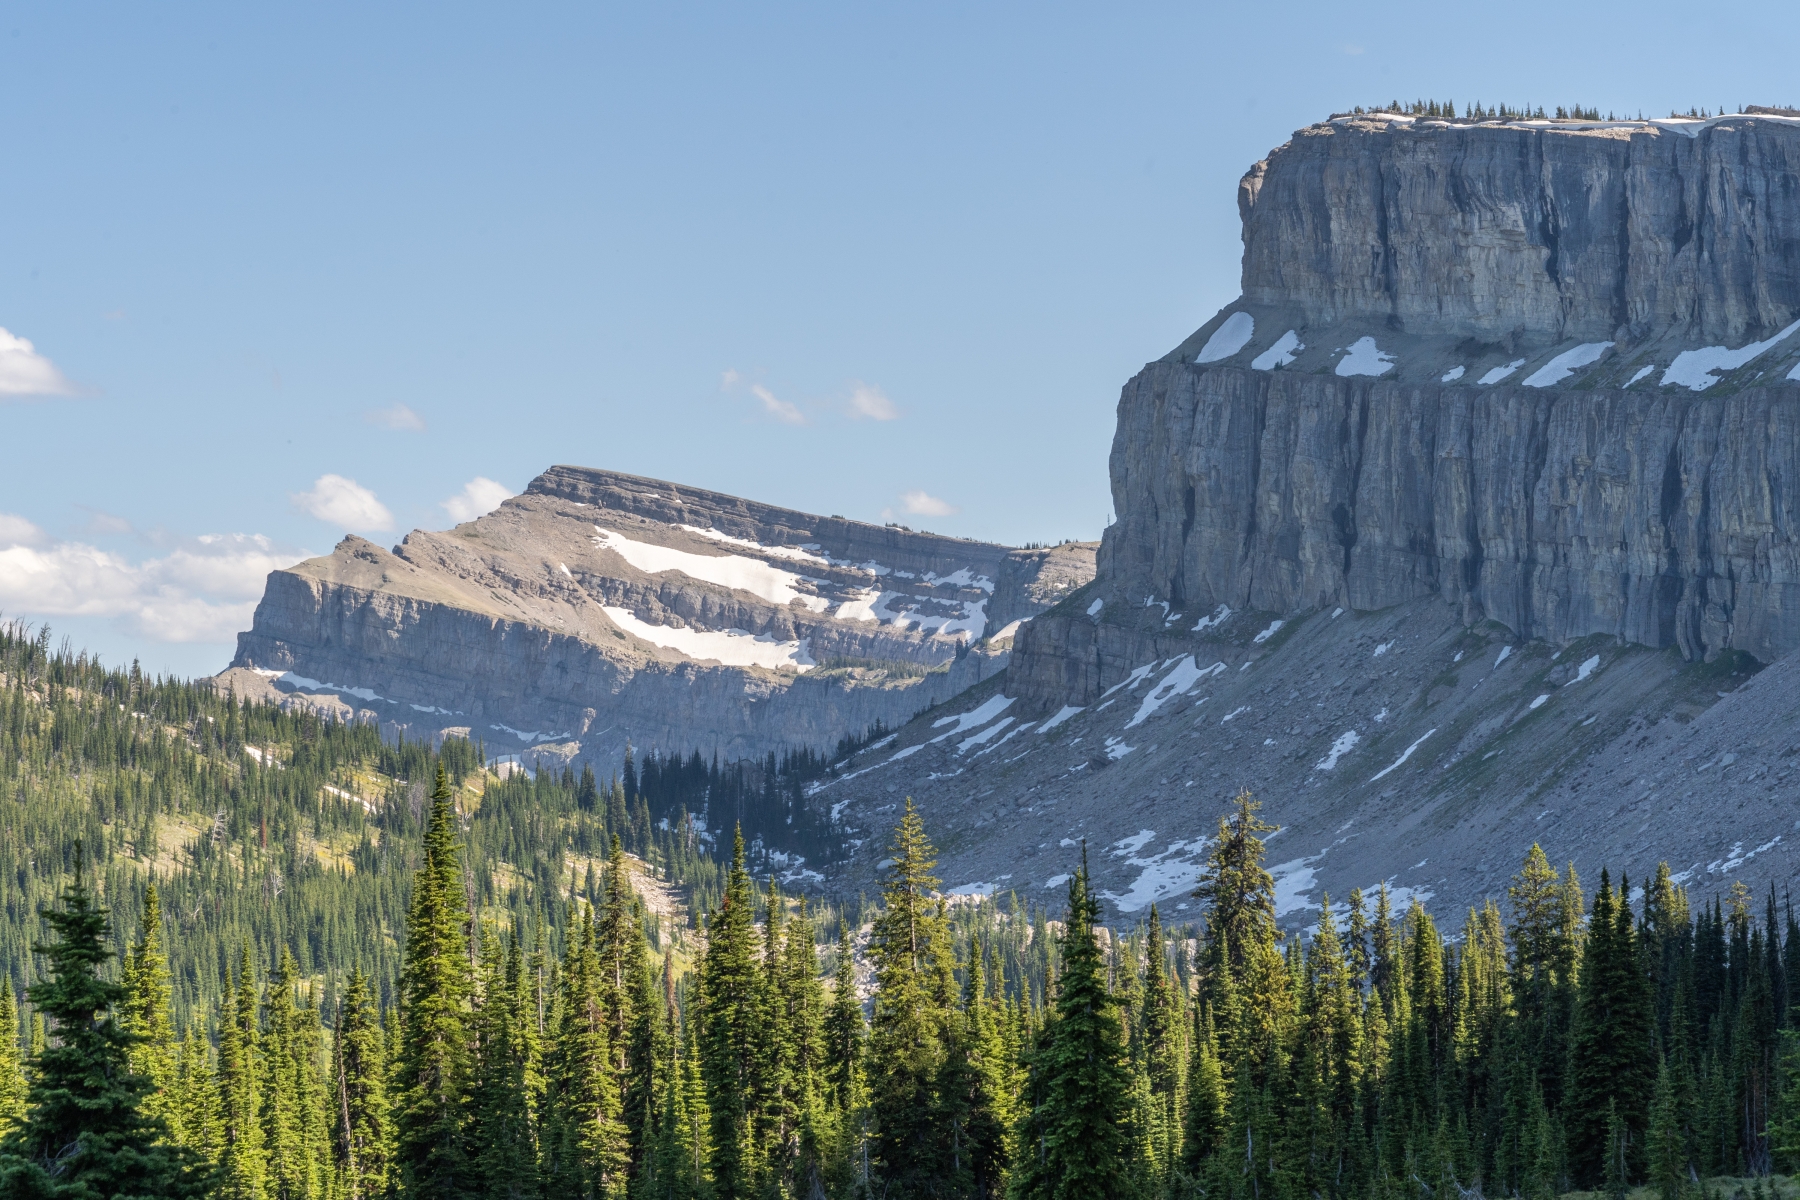
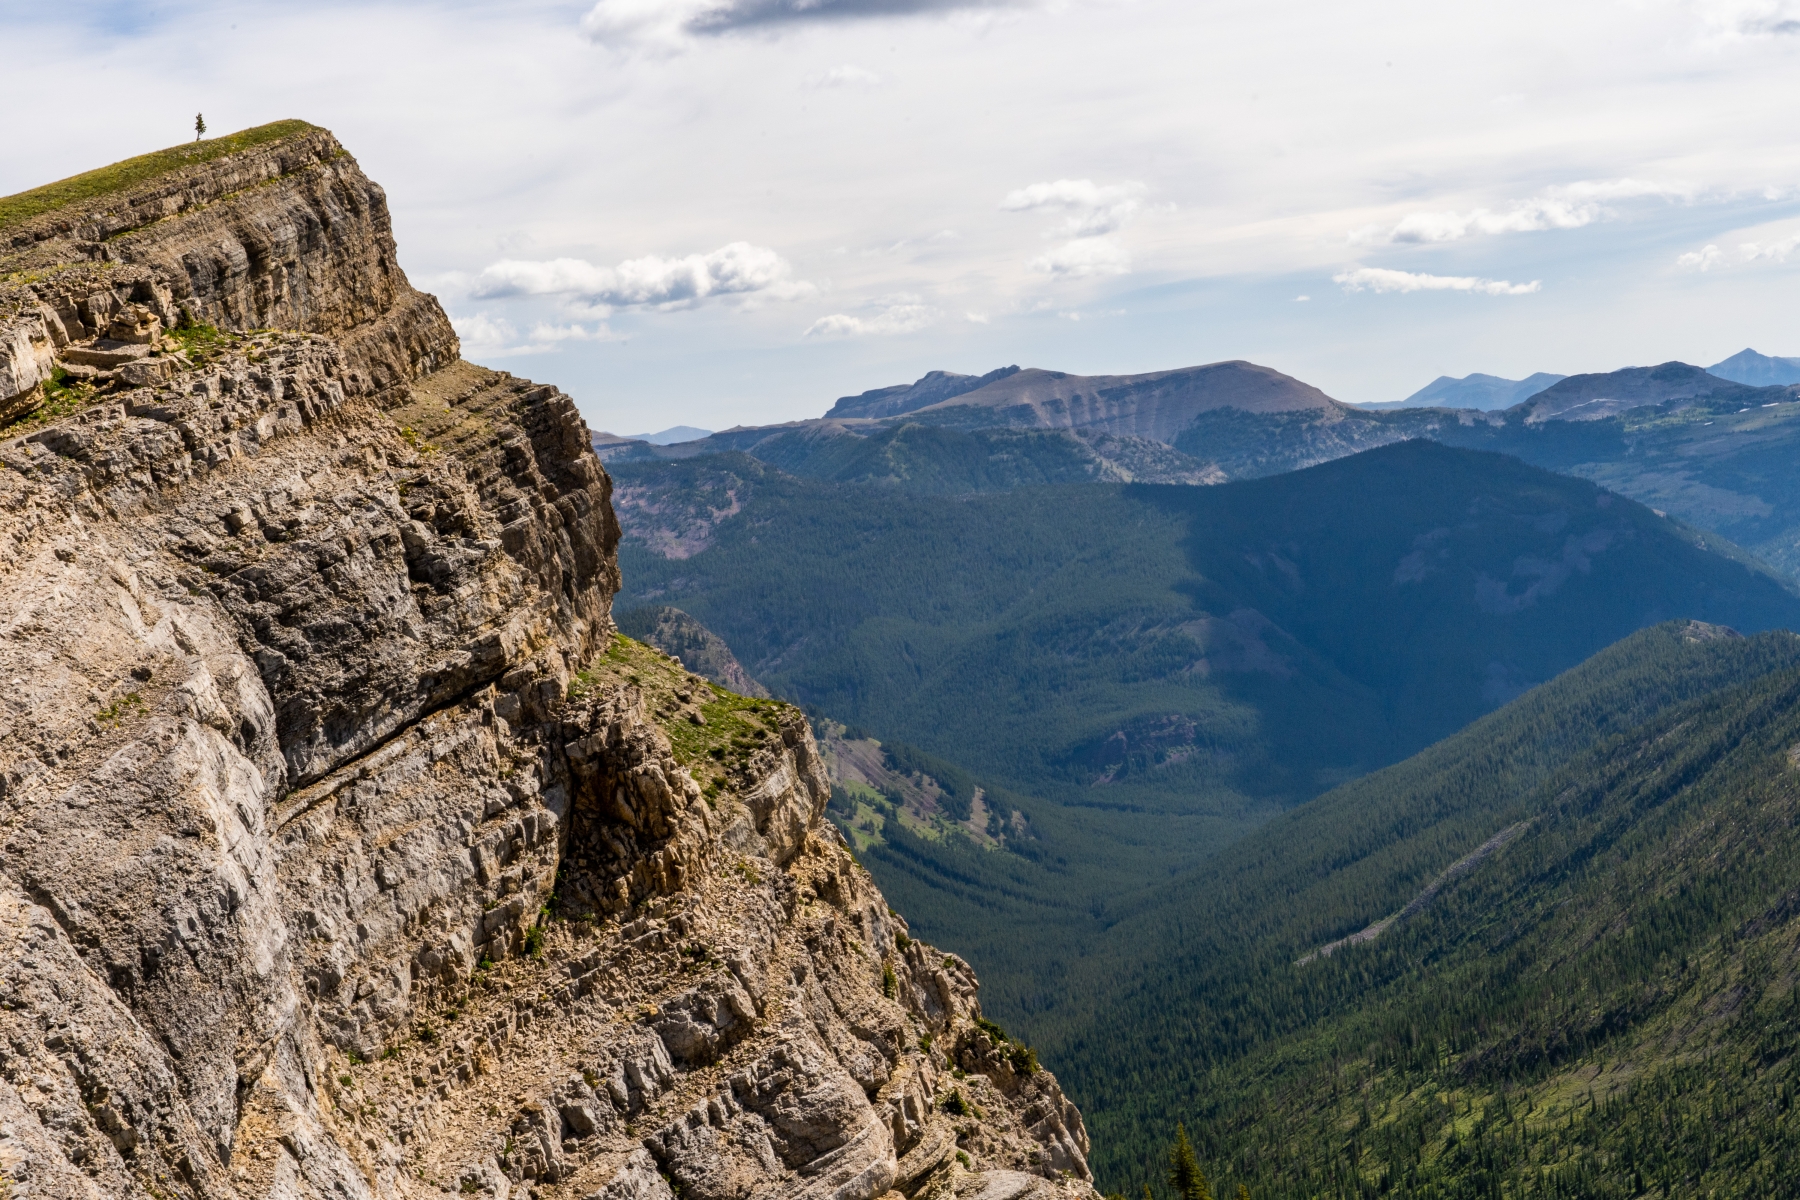
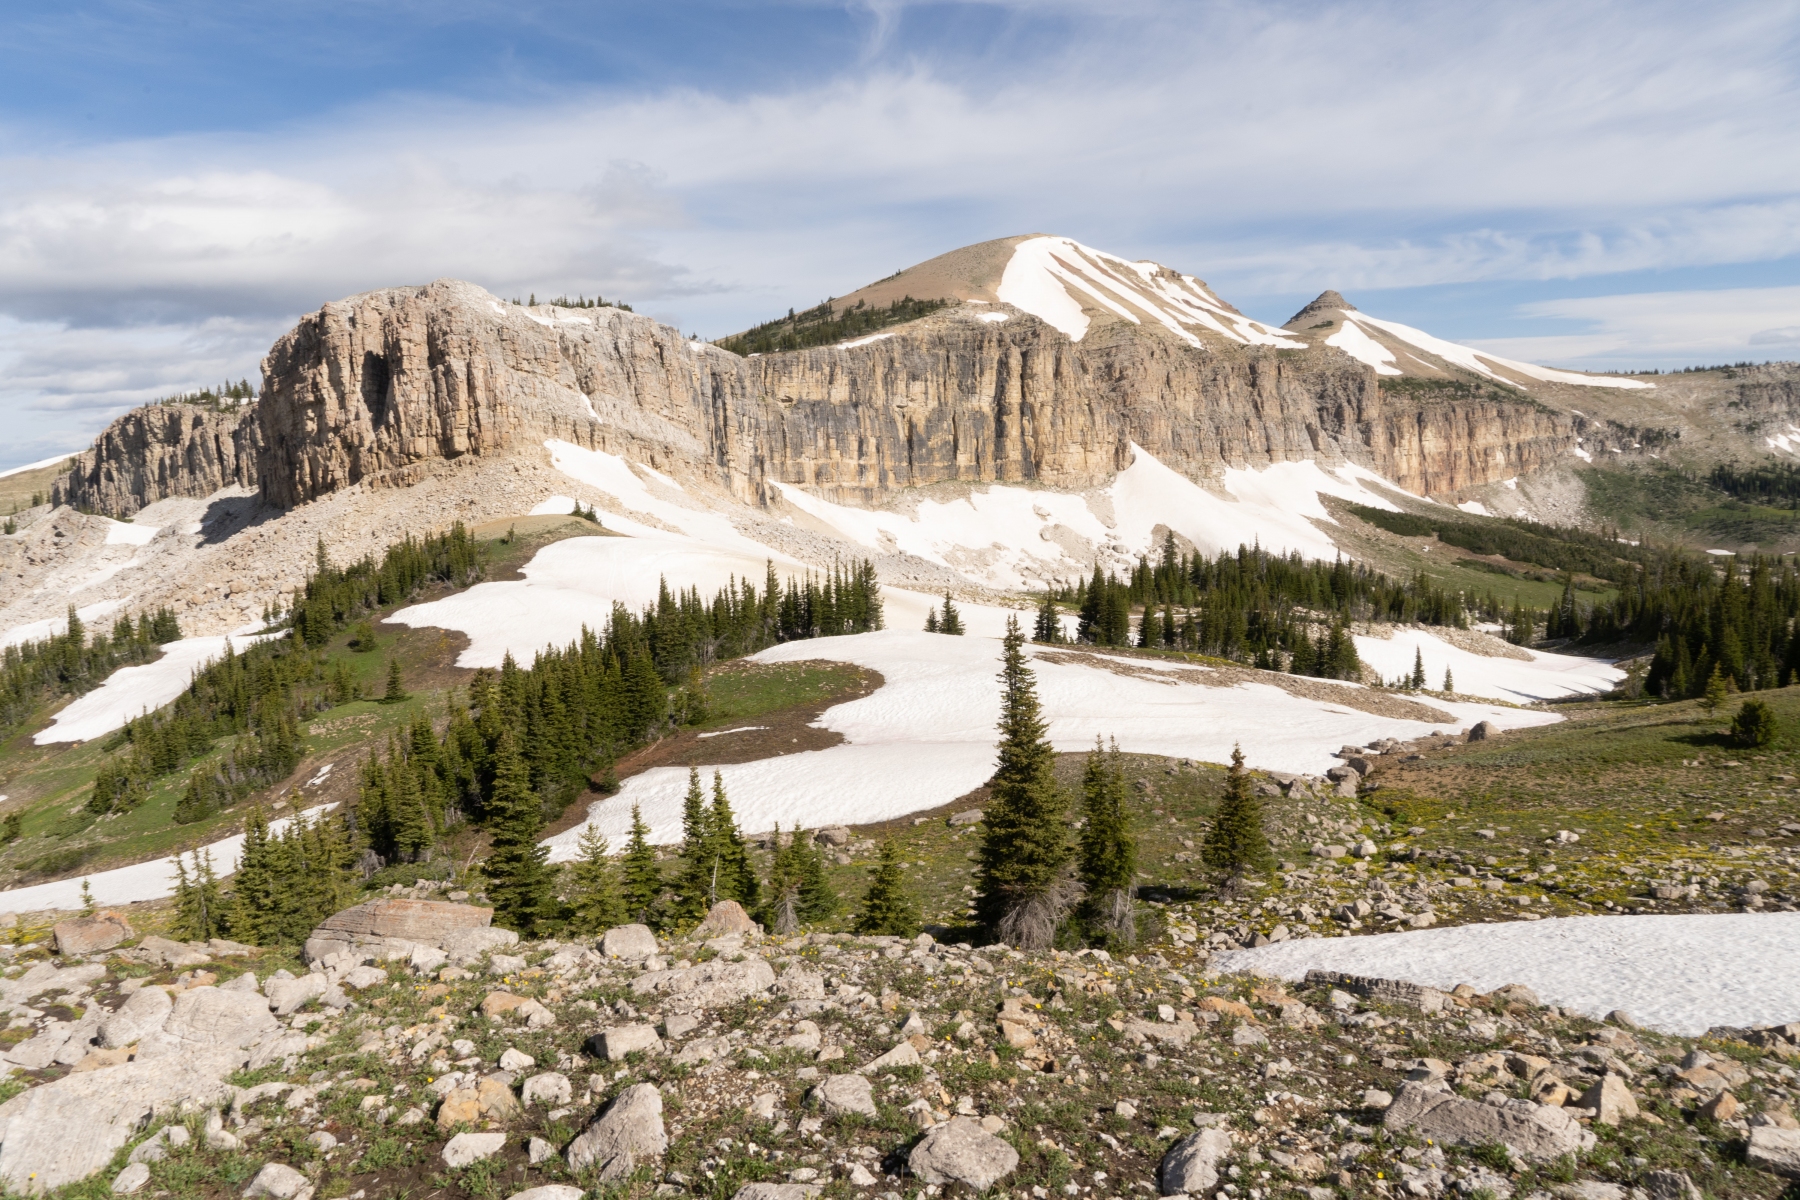
The Chinese Wall is an anomalous feature in the Bob Marshall Wilderness in Montana. A 12 mile-long 1,000-foot tall escarpment jutting straight up out of the ground. This route first takes you under the wall on the Continental Divide Trail, then back along the top of the wall completely off-trail. You'll be route-finding on top of the Chinese Wall and navigating around cliffs that break up the ridge of the wall. Below the wall, you'll be rewarded with towering cliffs, and above it, you'll have about two days of massive 360-degree views.
Difficulty Rating: Medium
Stats
Depending on the time of year you hike, you may meet some Continental Divide Trail thru-hikers who are just starting their 3,100-mile journey south to the Mexican border or CDT thru-hikers who are very close to the end of their hike, heading north to the Canadian border.
Interactive Map
Getting There
This route is a loop route, so there's no need to shuttle cars to one end. Just park at the Benchmark Trailhead, a popular starting and ending destination for the Bob Marshall Wilderness.
Like much of Montana, the Bob Marshall Wilderness is pretty remote, and you'll be driving on long isolated roads without much civilization around. Be sure to stock up on food before you head out there. If you need to pick up some last-minute supplies, you'll go through the little town of Augusta before hitting the dirt road. Once on the dirt road, you still have 30 miles and over an hour of driving to get to the trailhead at Benchmark. The road is dusty but in good shape, and any car should be able to make it.
The Route
Day 1: 10.9 miles
Summary: Easy hiking through an old burn area with lots of nice campsites to choose from.
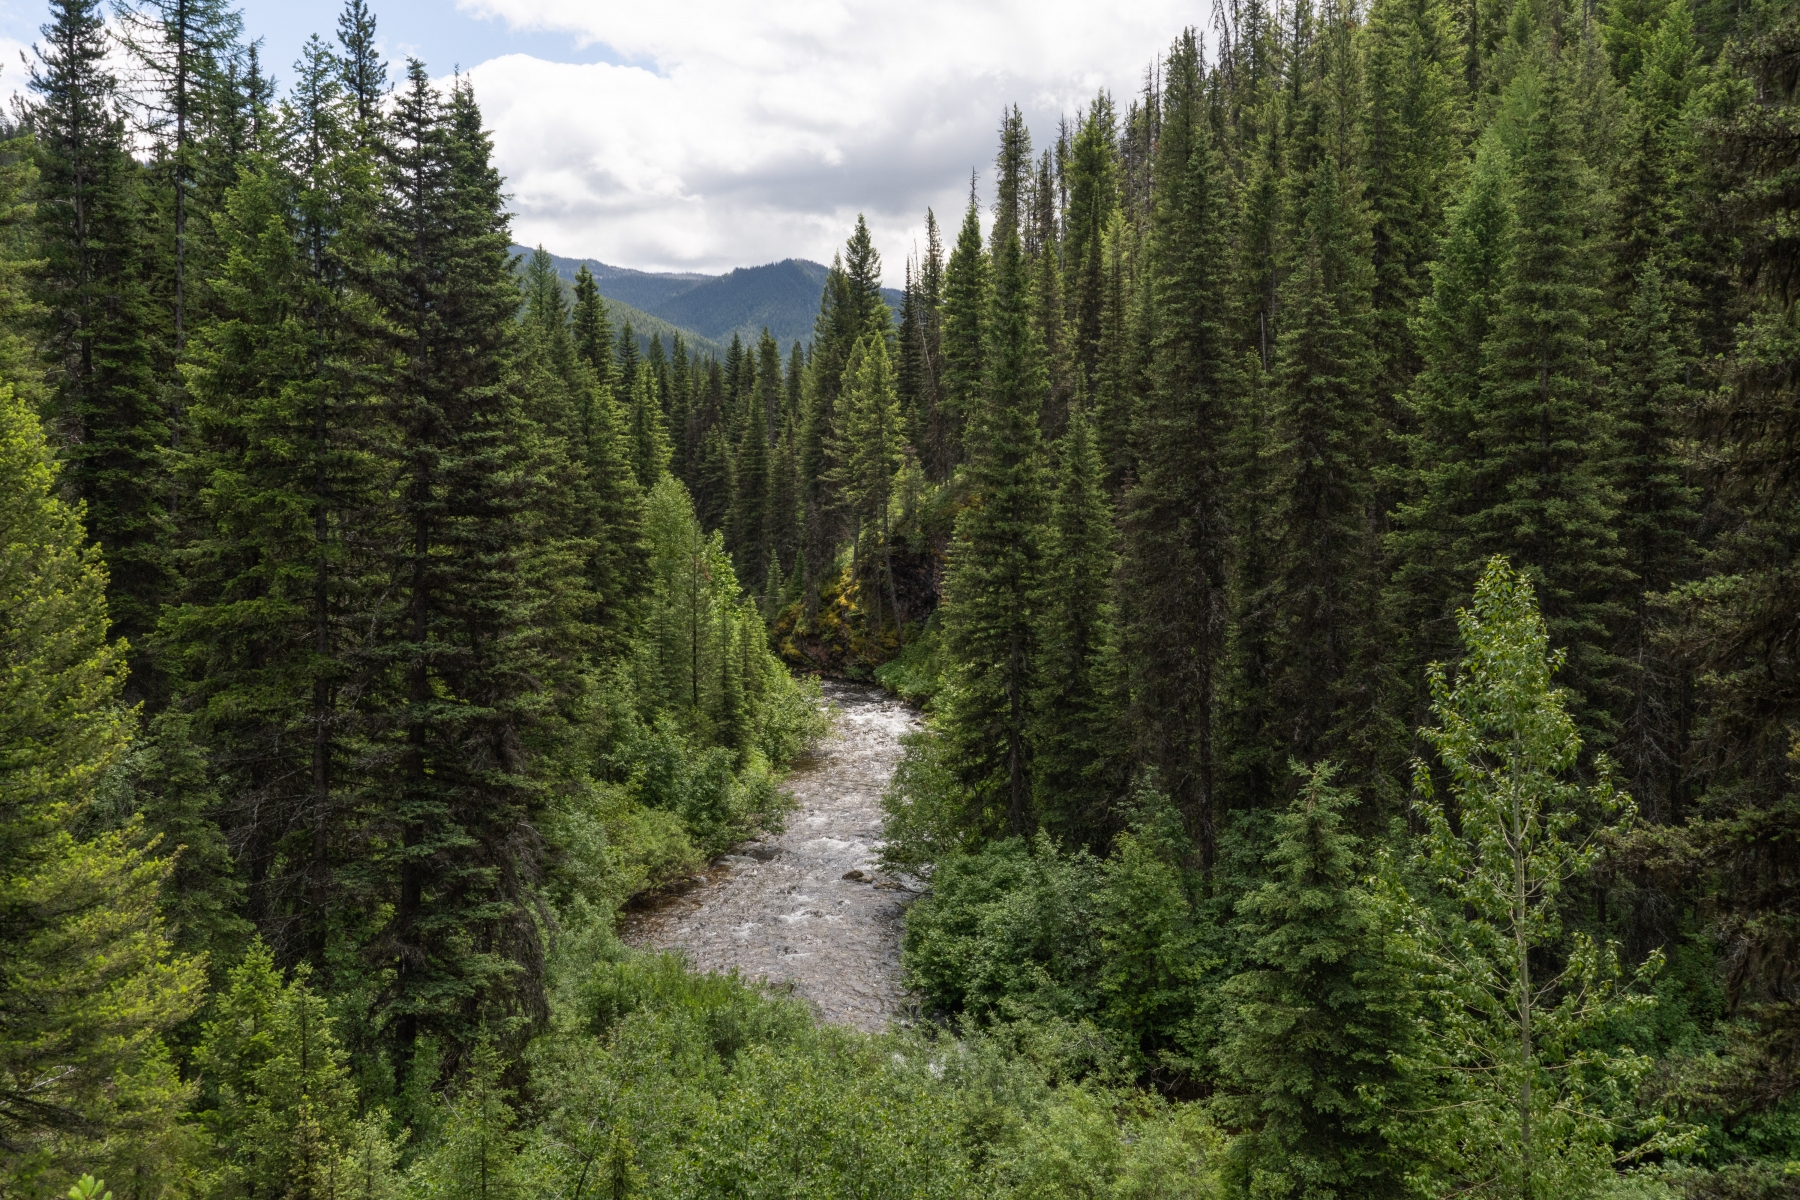
Starting at the Benchmark Trailhead, you'll be greeted by a Continental Divide Trail marker. You'll be following the CDT for much of this route which means two things. When you're on the CDT, it will likely be better maintained than the surrounding trails, and you might meet some CDT thru-hikers who are just beginning or ending their 3,100 mile-long journey. Take the South Fork Sun Trail through a burn area to a bridge over the West Fork South Fork Sun River. (Apparently, the Sun River has many forks). After the bridge, you'll be on the West Fork Sun trail, you'll be following one fork or another of the Sun River for a while, and it's all very easy hiking. There are a bunch of nice campsites between the Sun River bridge and the junction with the Ahorn Creek Trail. We ended up camping at that junction.


Day 2: 16.7 miles
Summary: A day of hiking under the Chinese Wall.
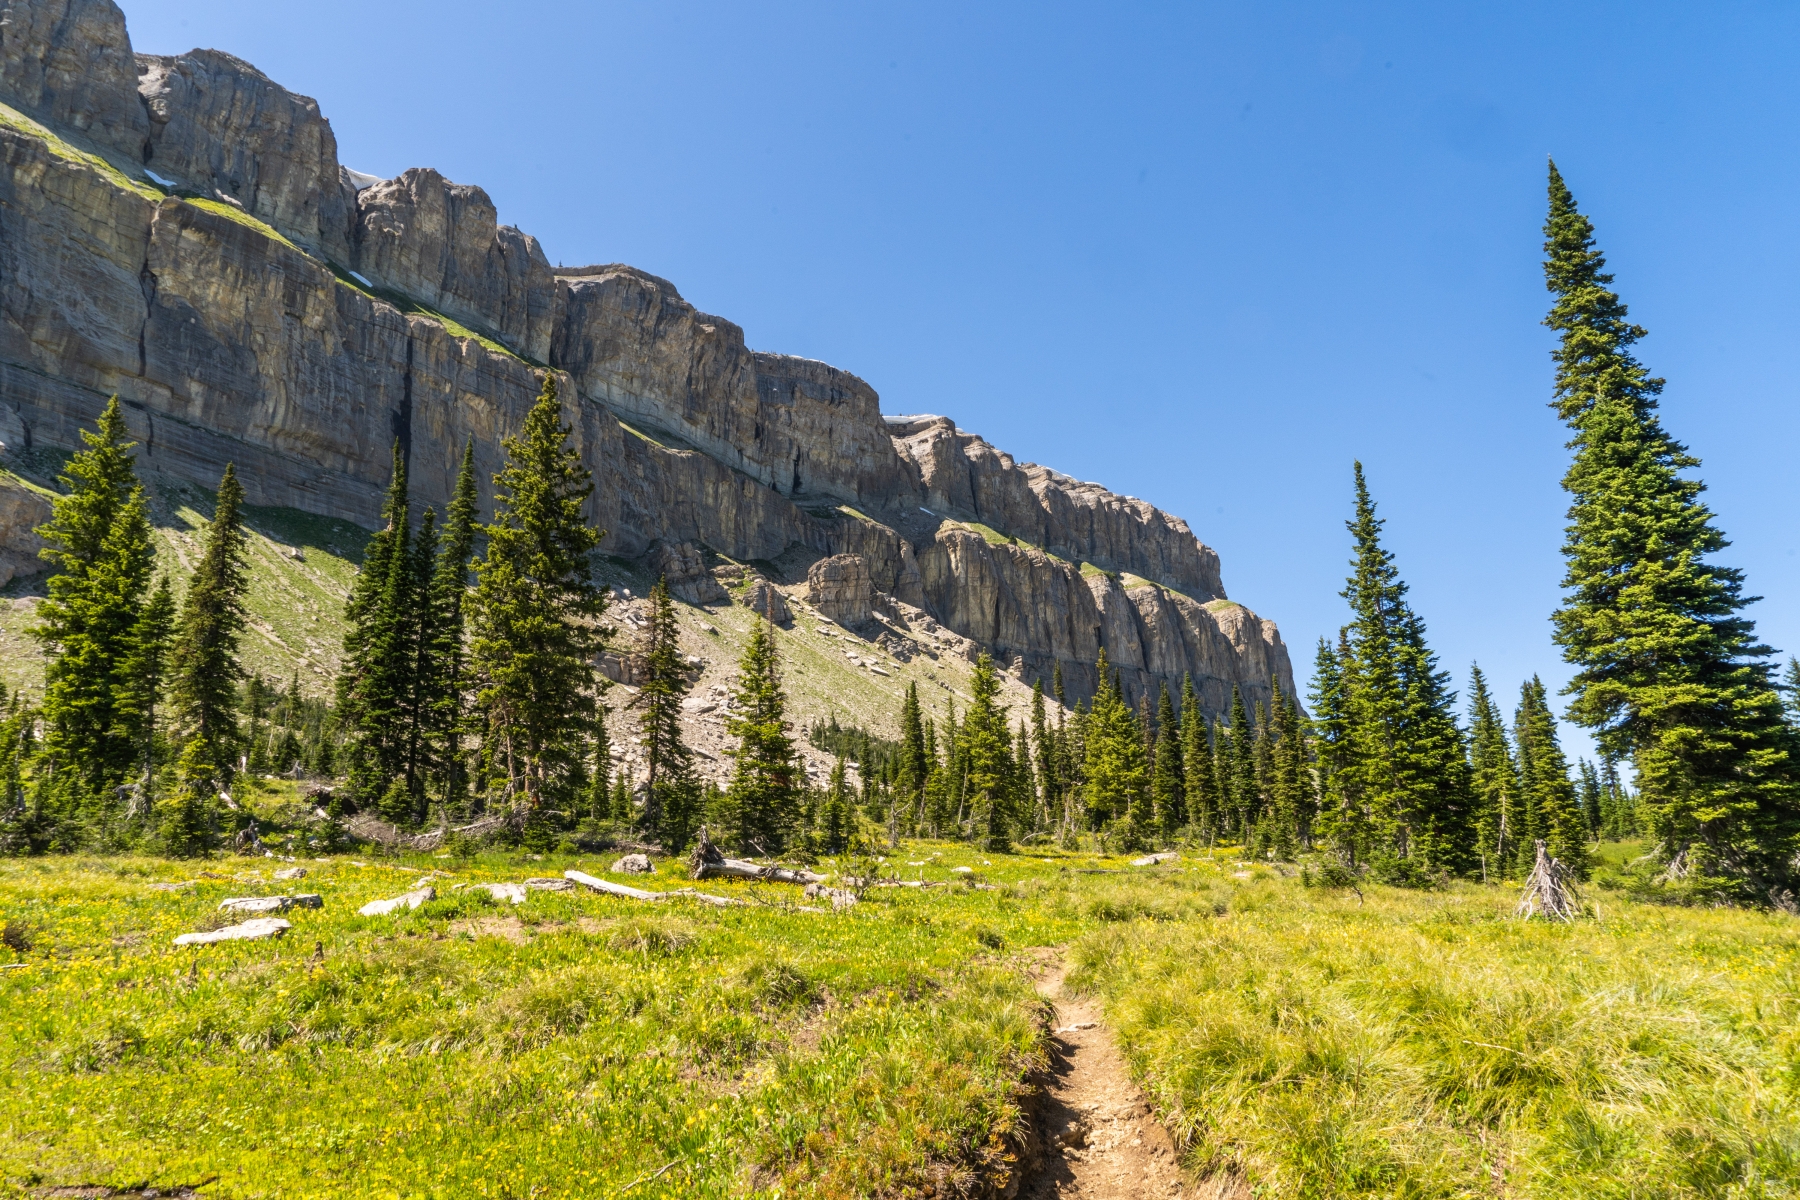
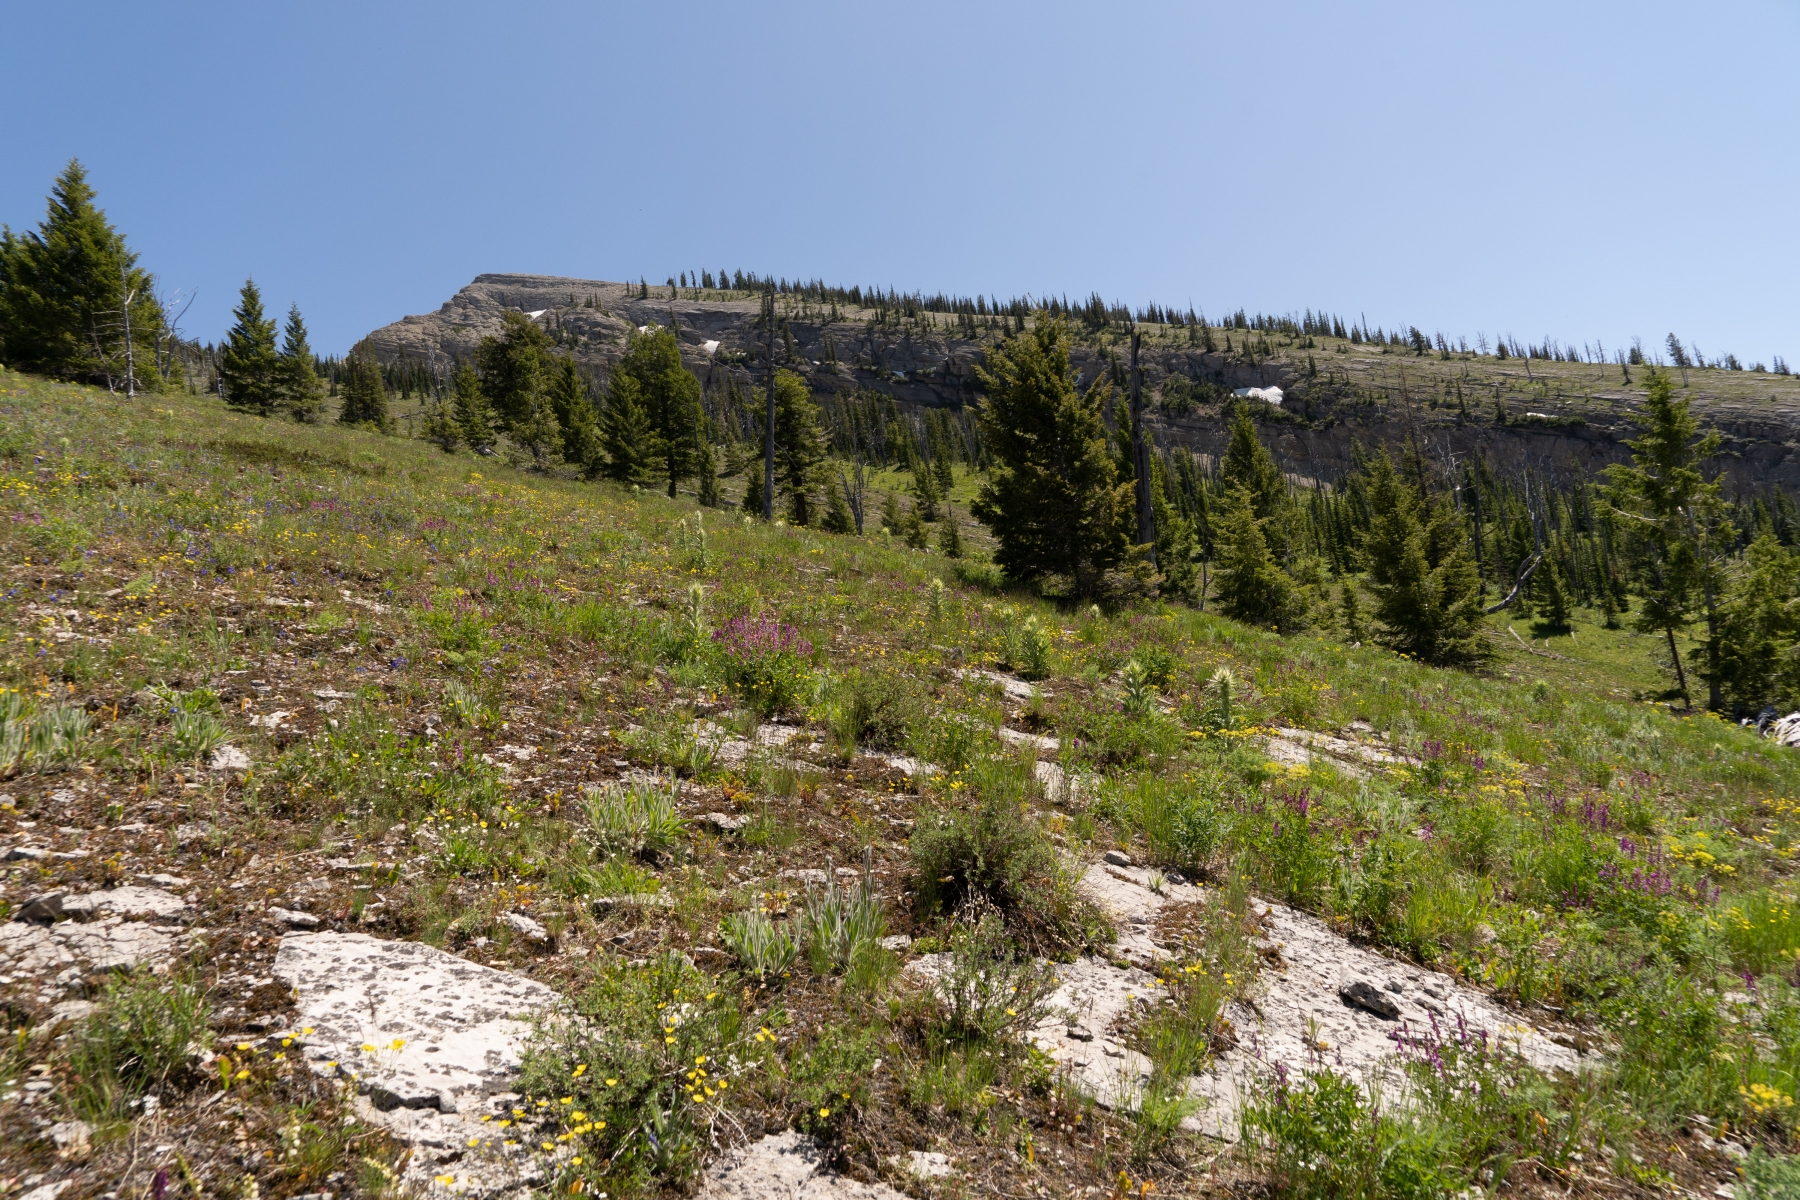
Stay on the Continental Divide Trail, also known as Wall Trail, after the junction with Ahorn Creek Trail. The valley gets narrower as you approach the Wall, and the trees close in. You'll have a gradual climb all the way up to the Chinese Wall. As you get closer, you'll catch glimpses of the massive escarpment between the trees, but it may be frustrating not to see the whole thing at once. Keep going until you get to the pass just below Cliff Mountain. At the pass, take the faint side trail going towards the Wall; you'll find a wide-open view of the entire Wall in both directions. That makes a pretty good place to take a lunch break. Keep in mind that there is a no-camping zone along this portion of the Wall, so you will have to either camp before it or get past the northern end of the Wall to set up camp.
From the pass go back downhill, continuing north on the Wall Trail. You may feel like an ant for the next 7 miles as you hike right next to the Chinese Wall in nice meadows. Then you have some climbing to get to My Lake which has a real nice campsite. We camped there; and with a very friendly deer who wandered around the campsite.
Day 3: 16.7 miles
Summary: Much of the day is in the trees and on some low-traffic trails. The hiking gets exciting towards the end when you finally get on the ridge by Bungalow Mountain.
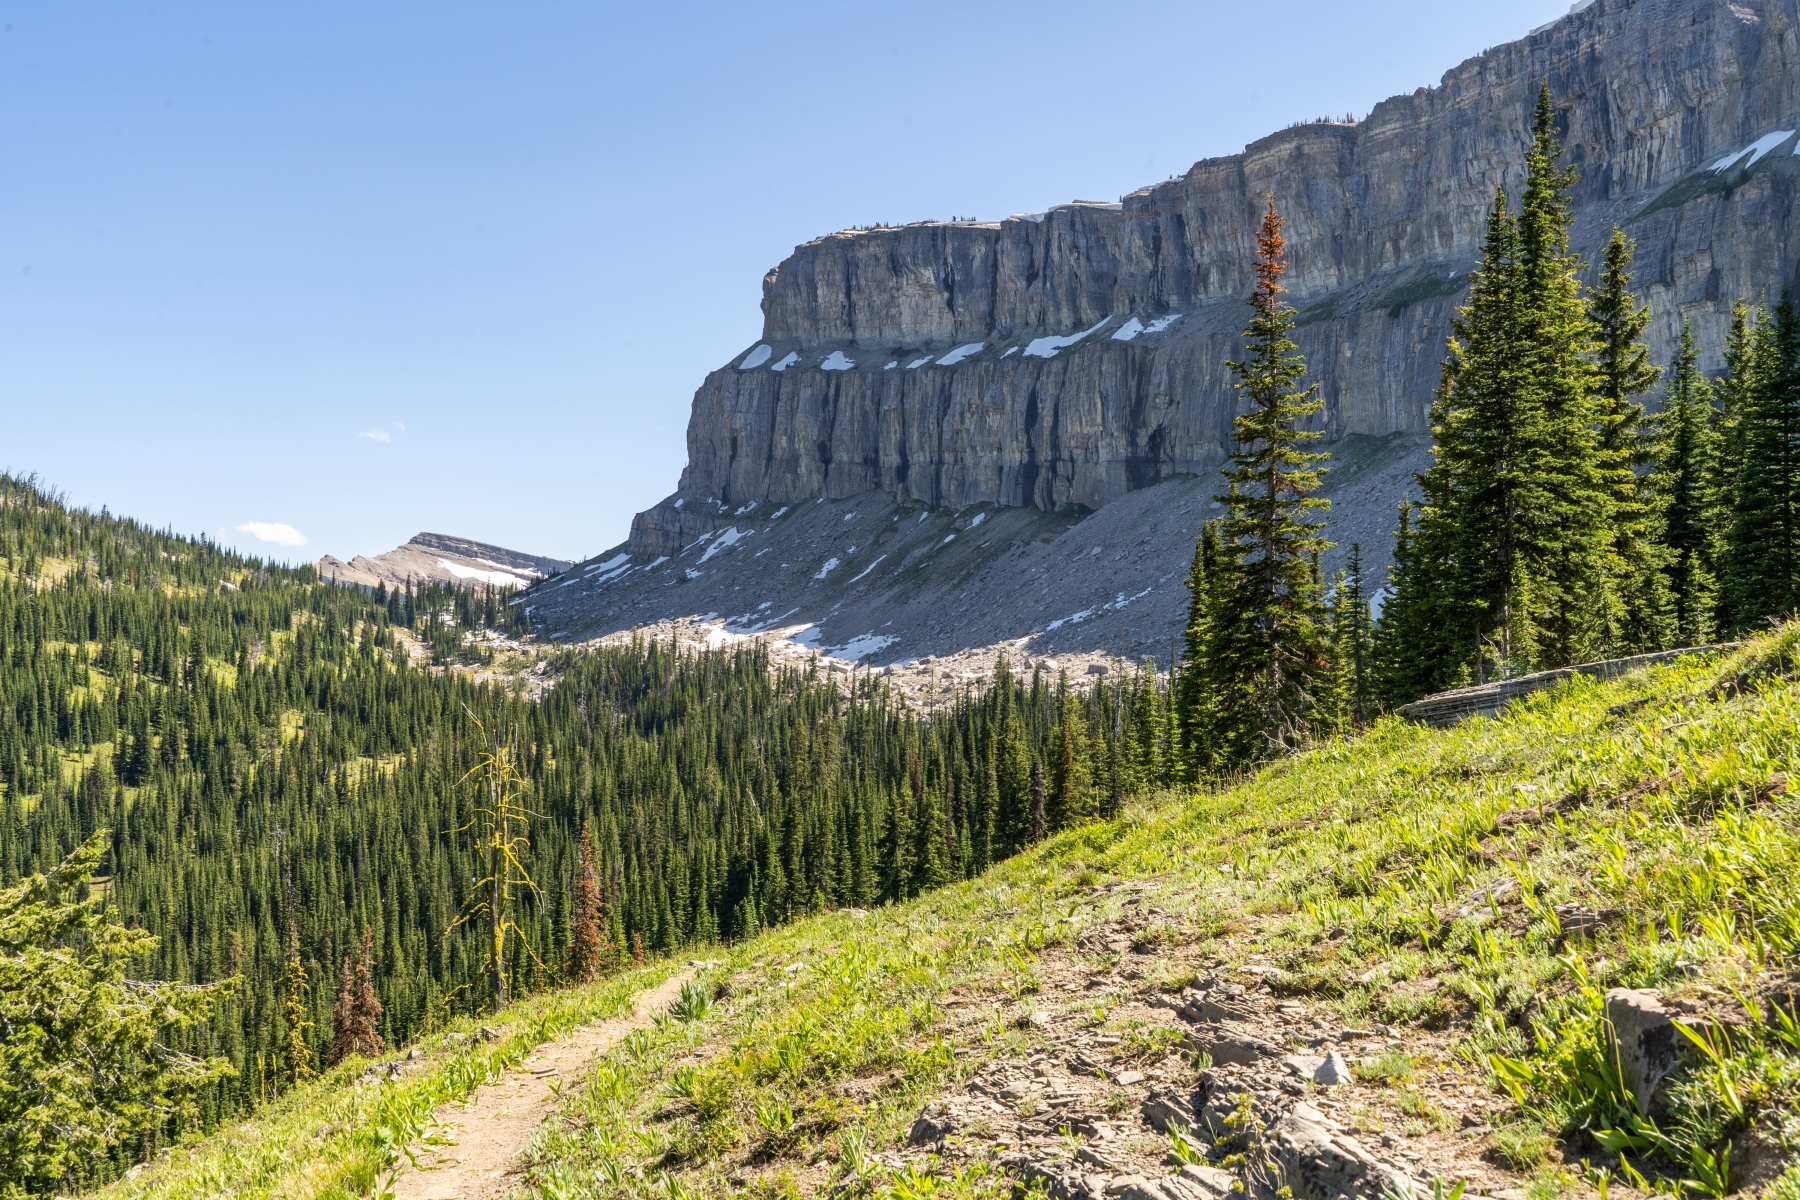
From My Lake, head down to the Spotted Bear Pass, where you will leave the Continental Divide Trail. Take Trail 83 to follow the Spotted Bear River north. Once off the CDT, it becomes apparent because the trail is more overgrown. We just happened to be hiking it after some rain, so even though it wasn't raining anymore, the overgrown brush kept us soaked. There are some blowdowns to deal with too, but the trail is still easy to follow. After a long and forested descent, change directions and cross the Spotted Bear River, a small river ford.
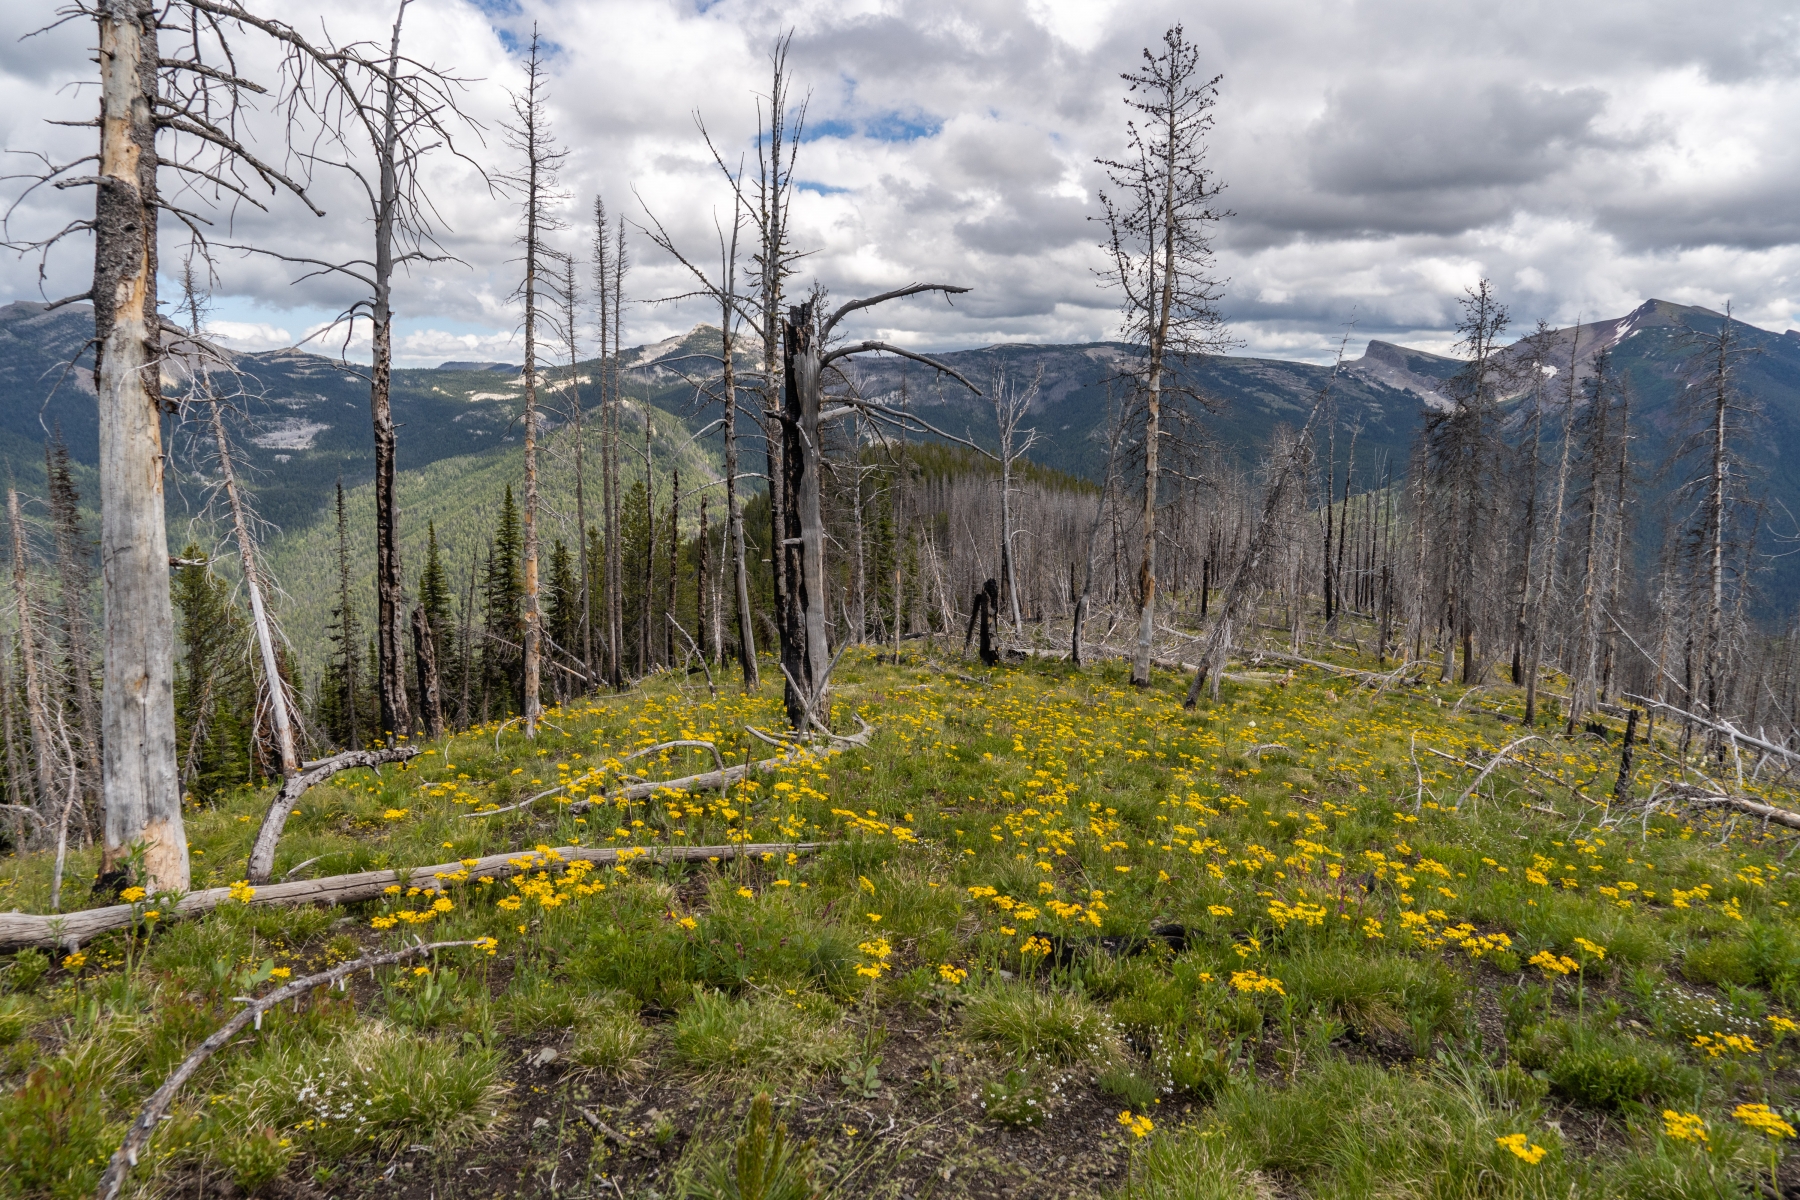
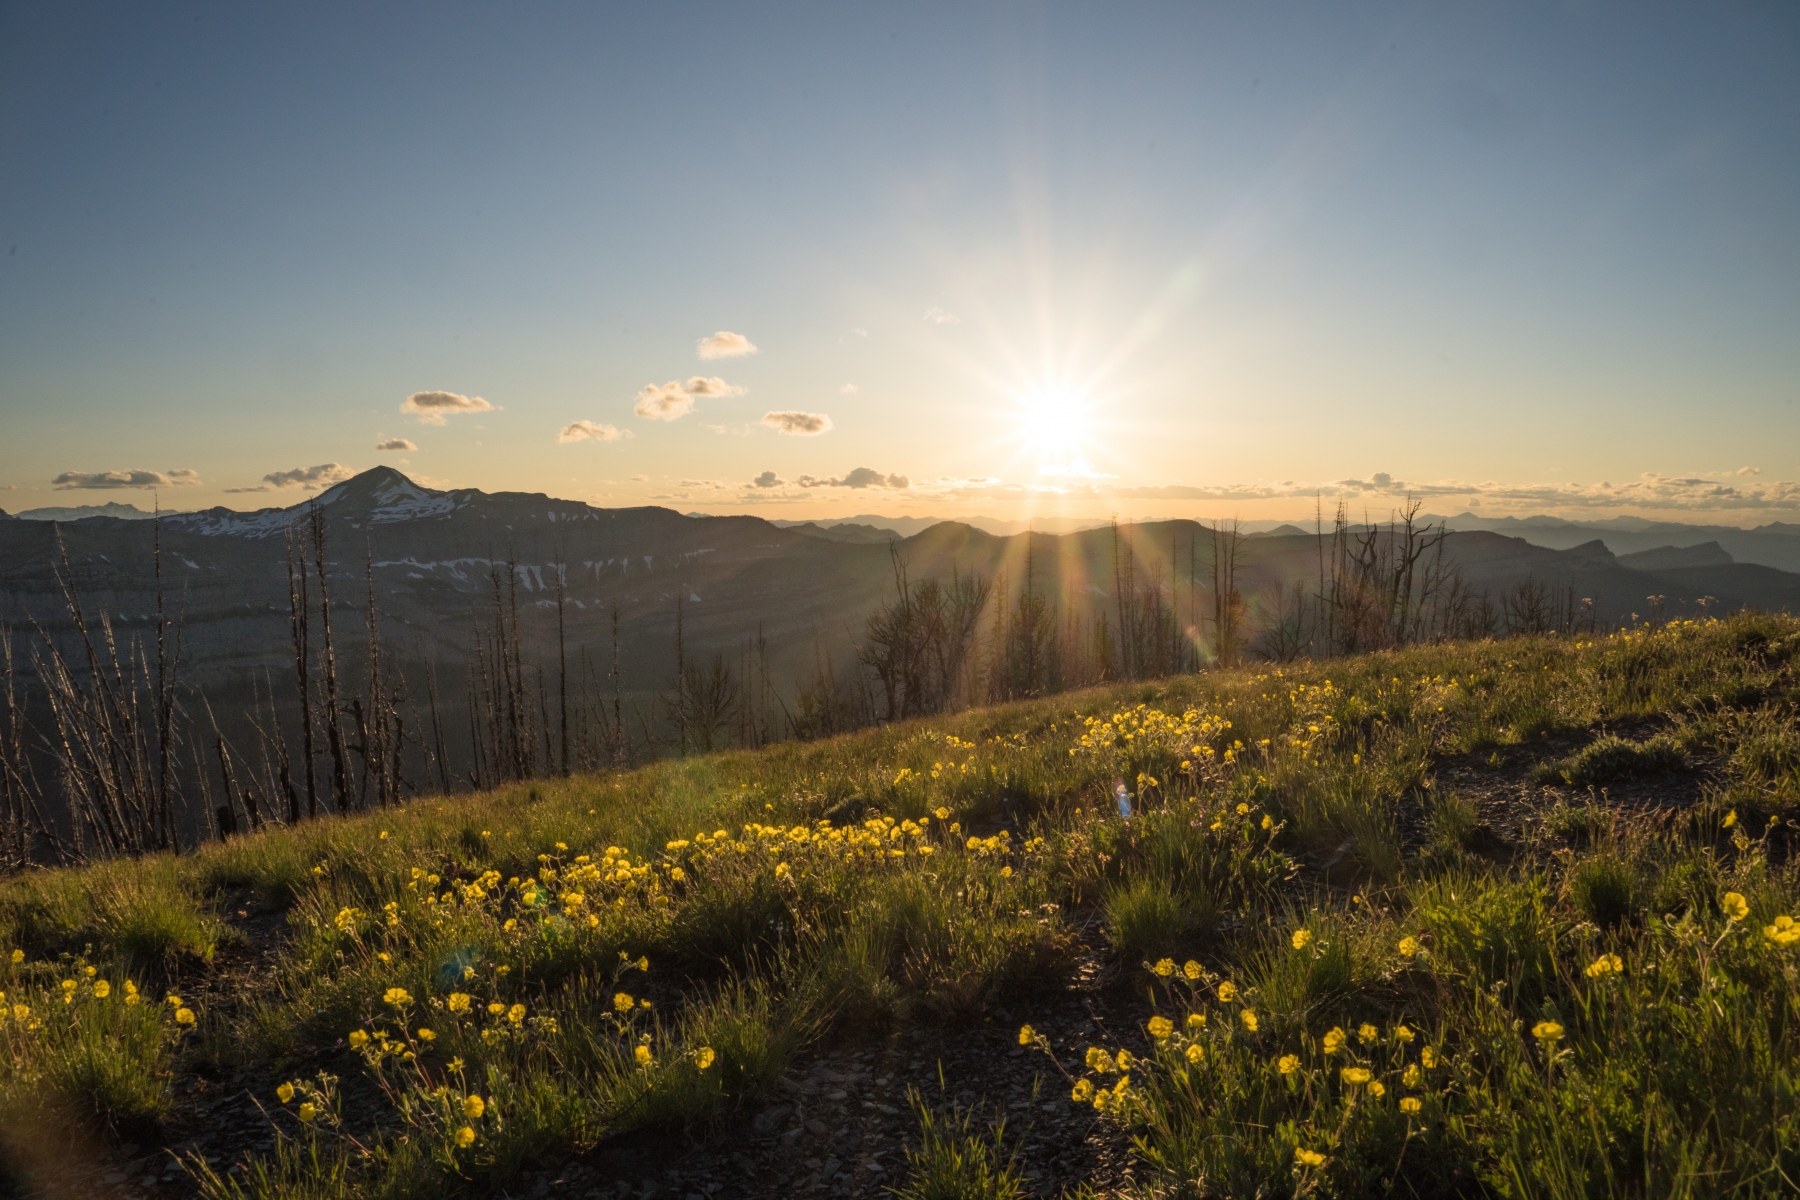
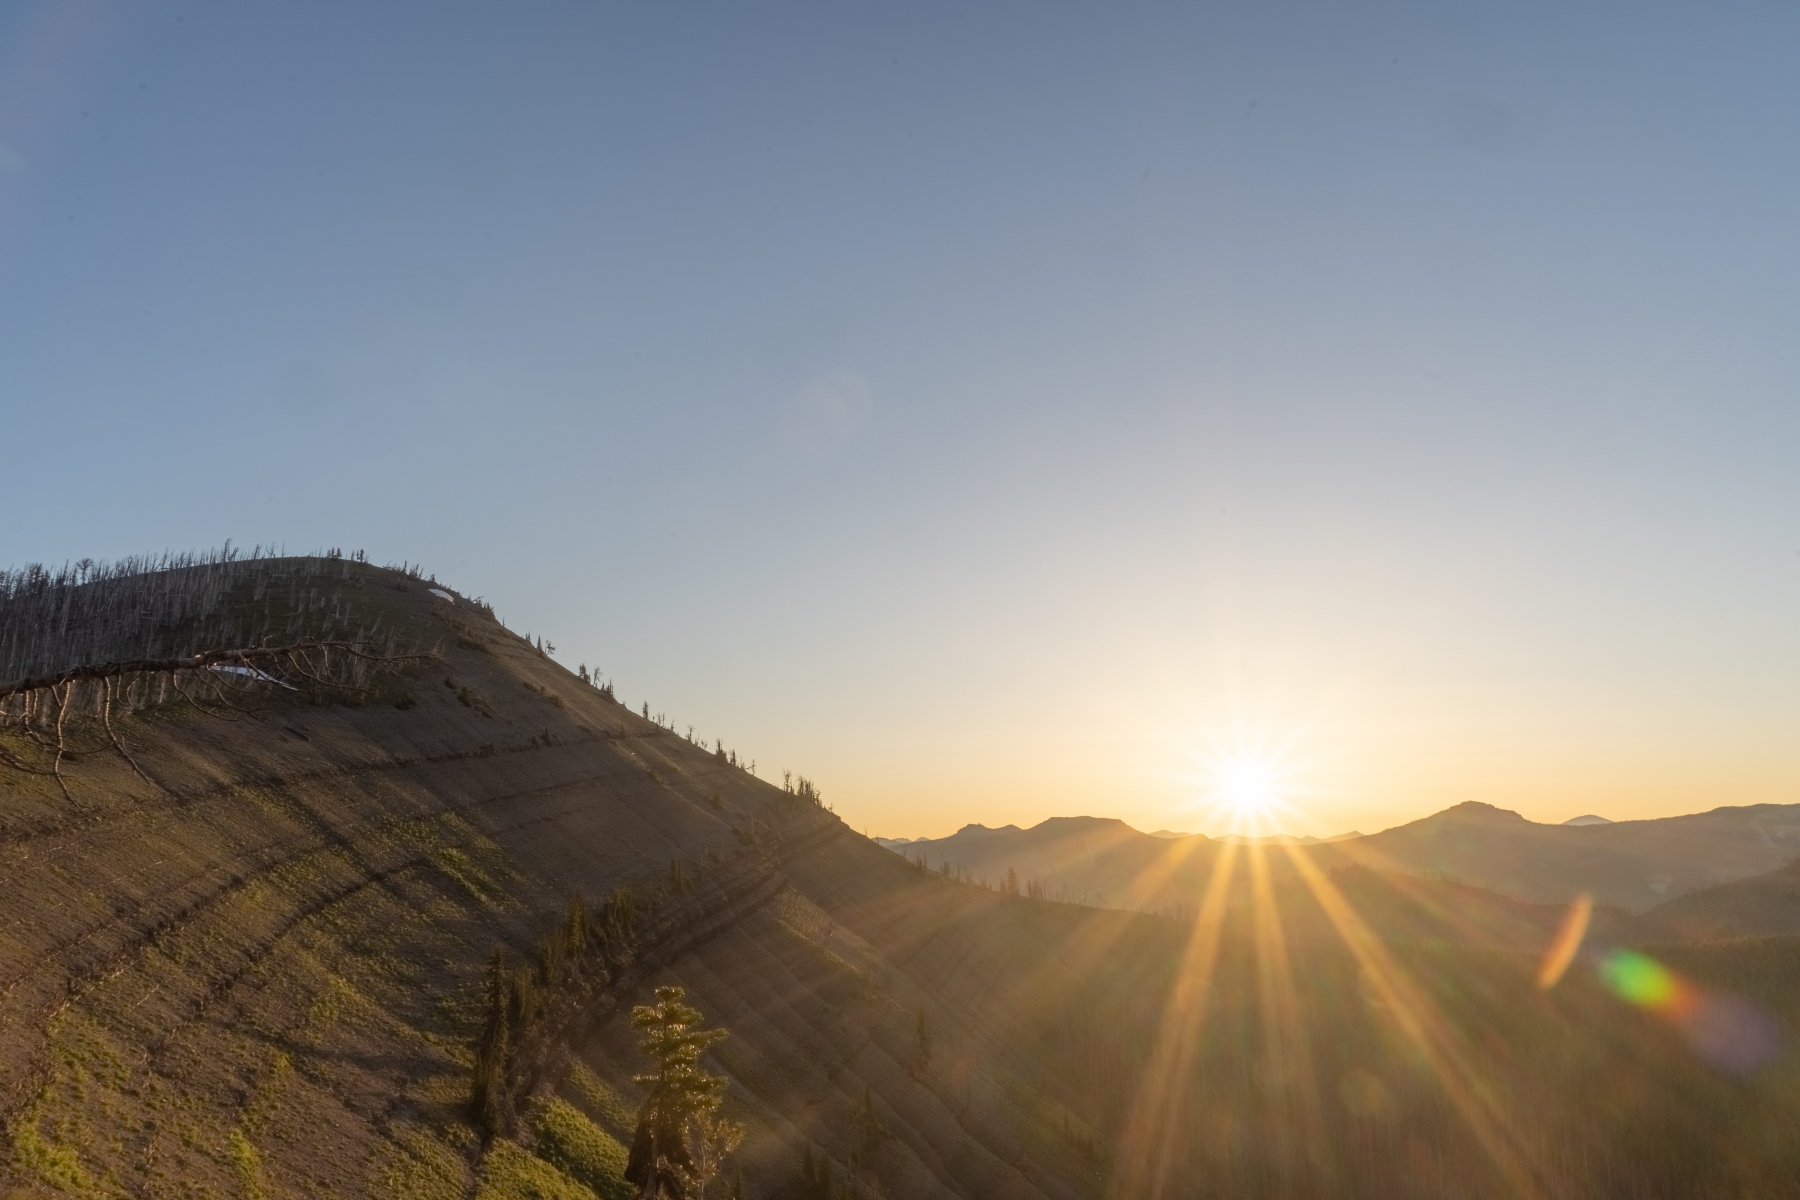
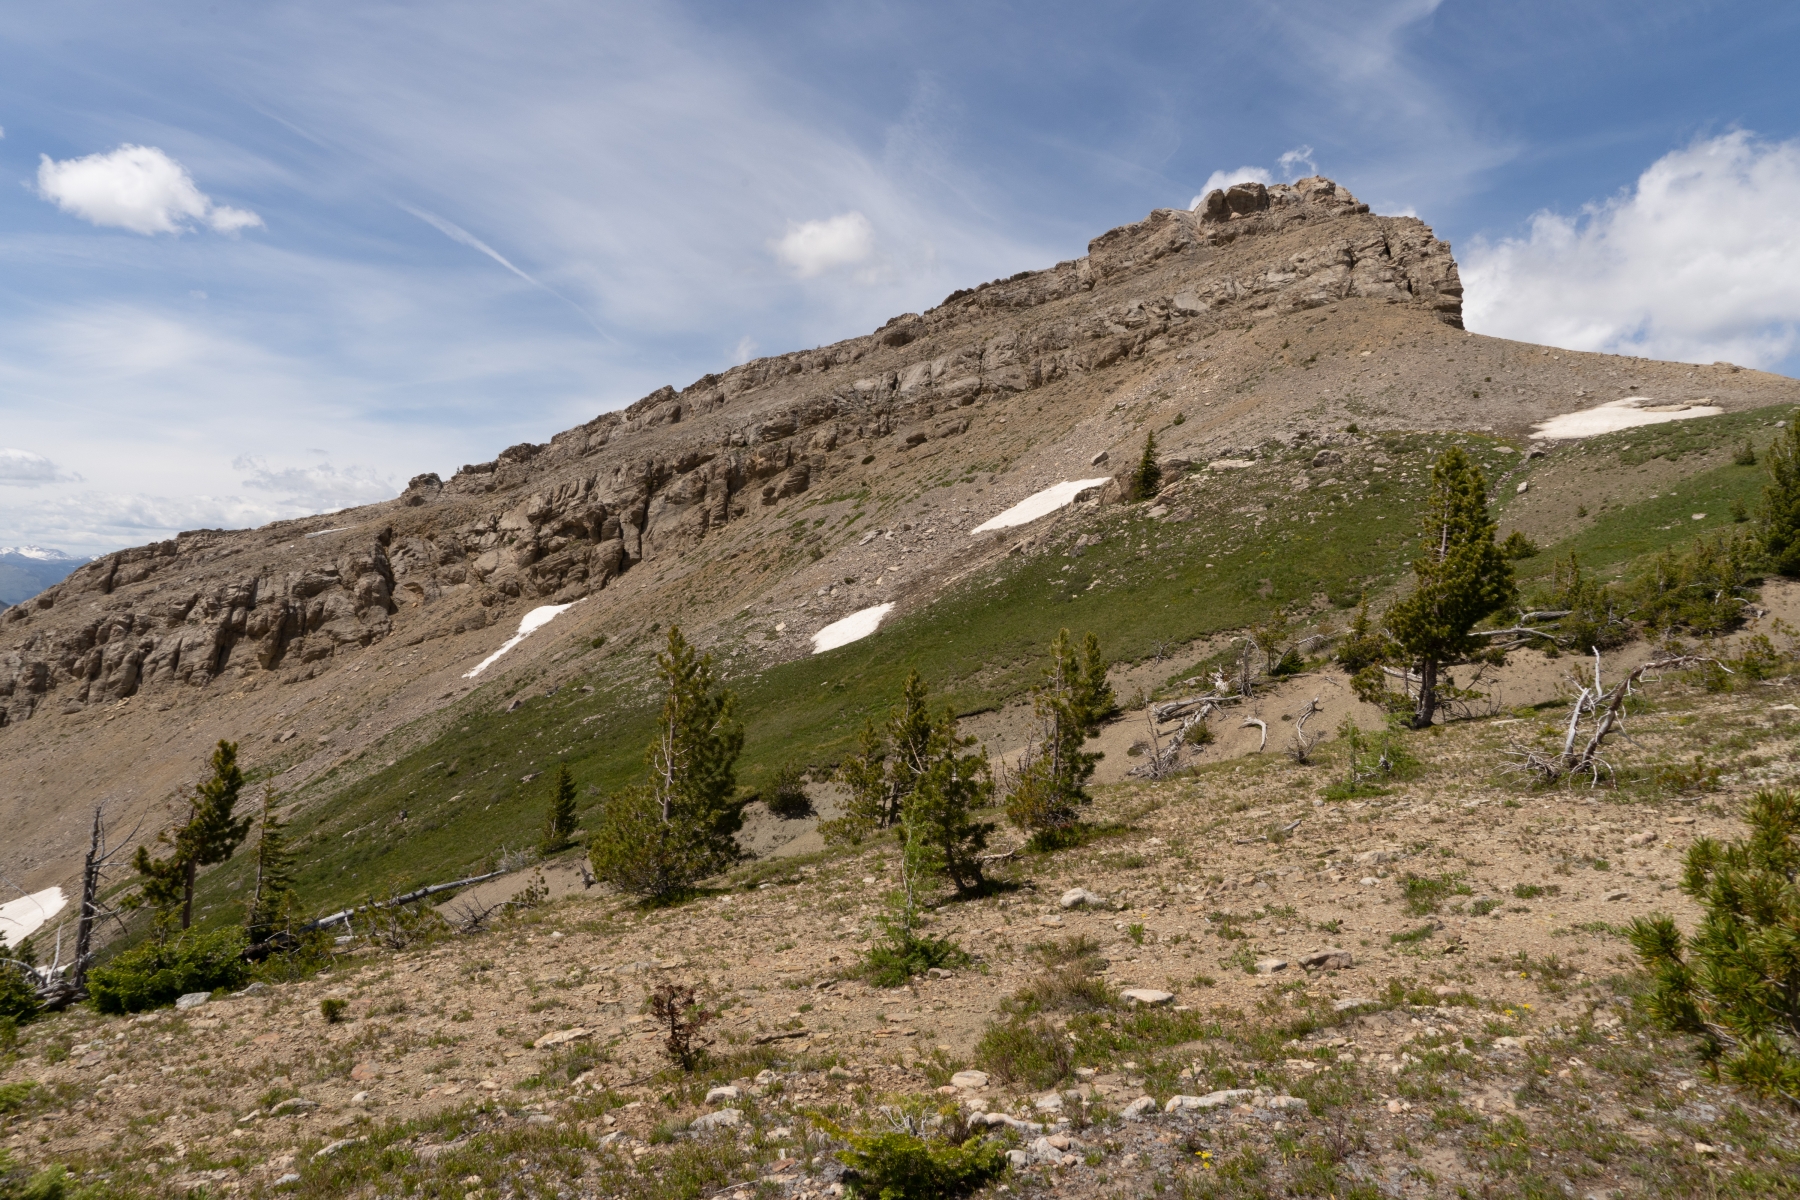
Take Trail 243 heading up to Bungalow Mountain, be careful not to take trail 90, which goes in a similar direction. Now it's a long climb, eventually topping out at Bungalow Mountain. Make sure you fill up on water somewhere around the 6,800-foot contour or wherever you think the last reliable water source is. You will probably not find any water for the next 8 miles when you cross Juliet Creek. The trail takes you along the ridge, and there is a short side trail going up to the peak of Bungalow Mountain. It's definitely worth it, and that's a great place to watch the sunset. We camped on the little saddle just south of Bungalow Mountain. It was a dry camp, but we planned ahead and took plenty of water earlier so we could camp up high on the ridge.


Day 4: 11.7 miles
Summary: A challenging bushwhack and some tricky navigation to get on top of the Chinese Wall. Once up there, it's all worth it.
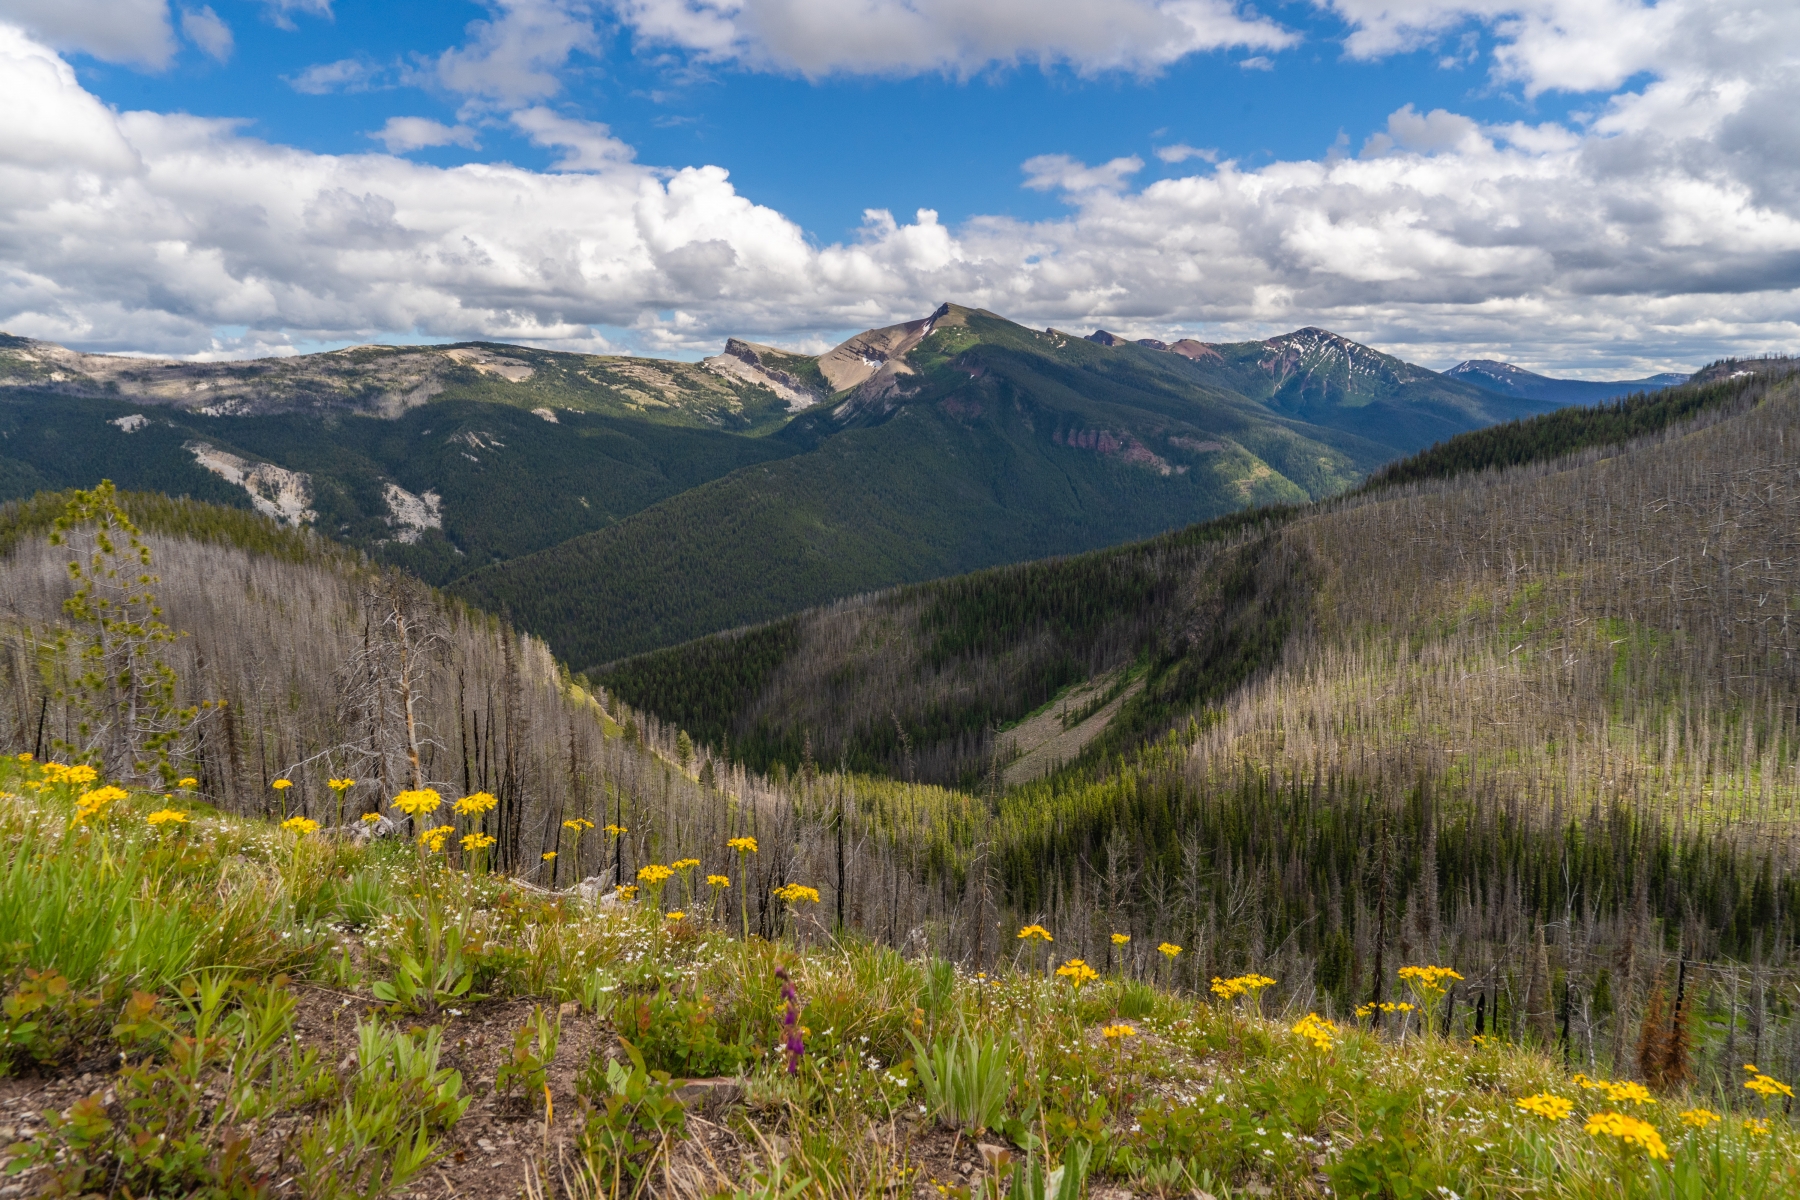
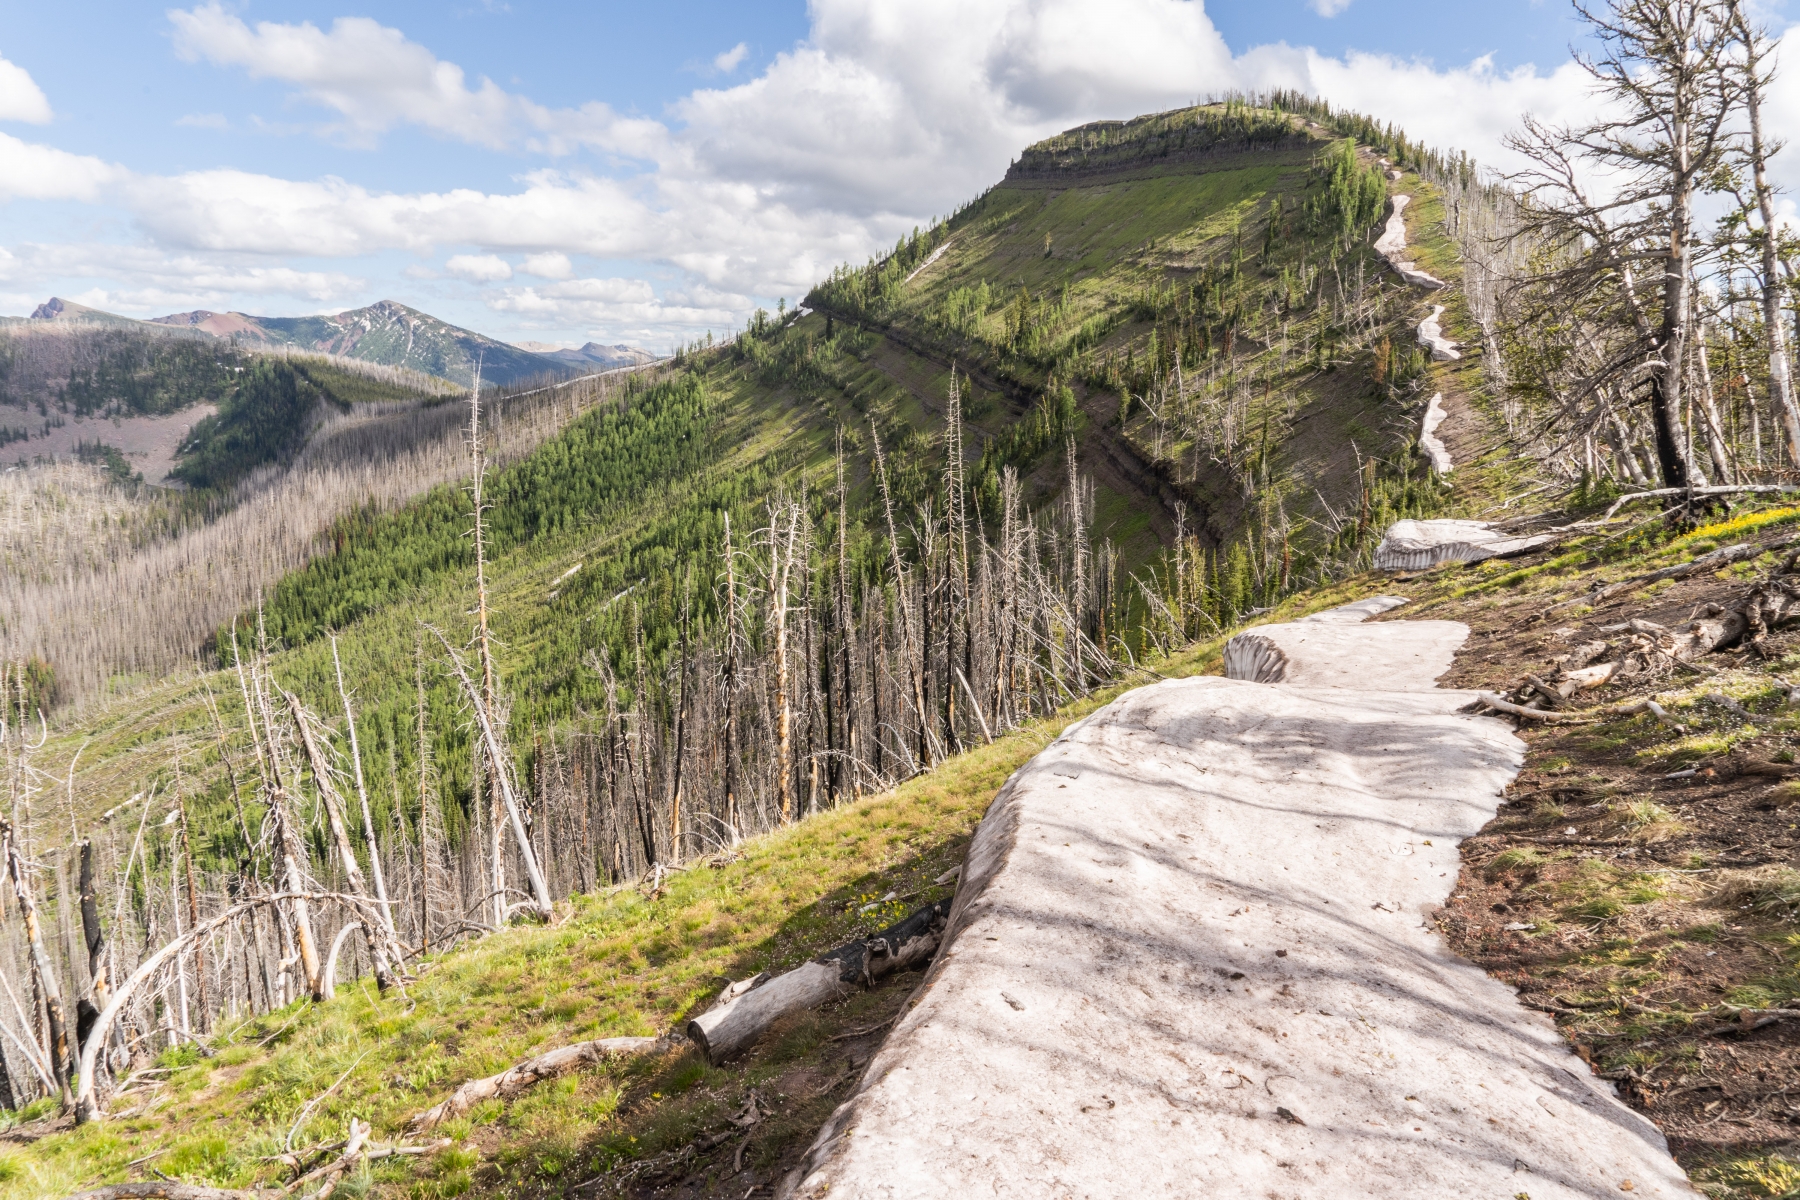
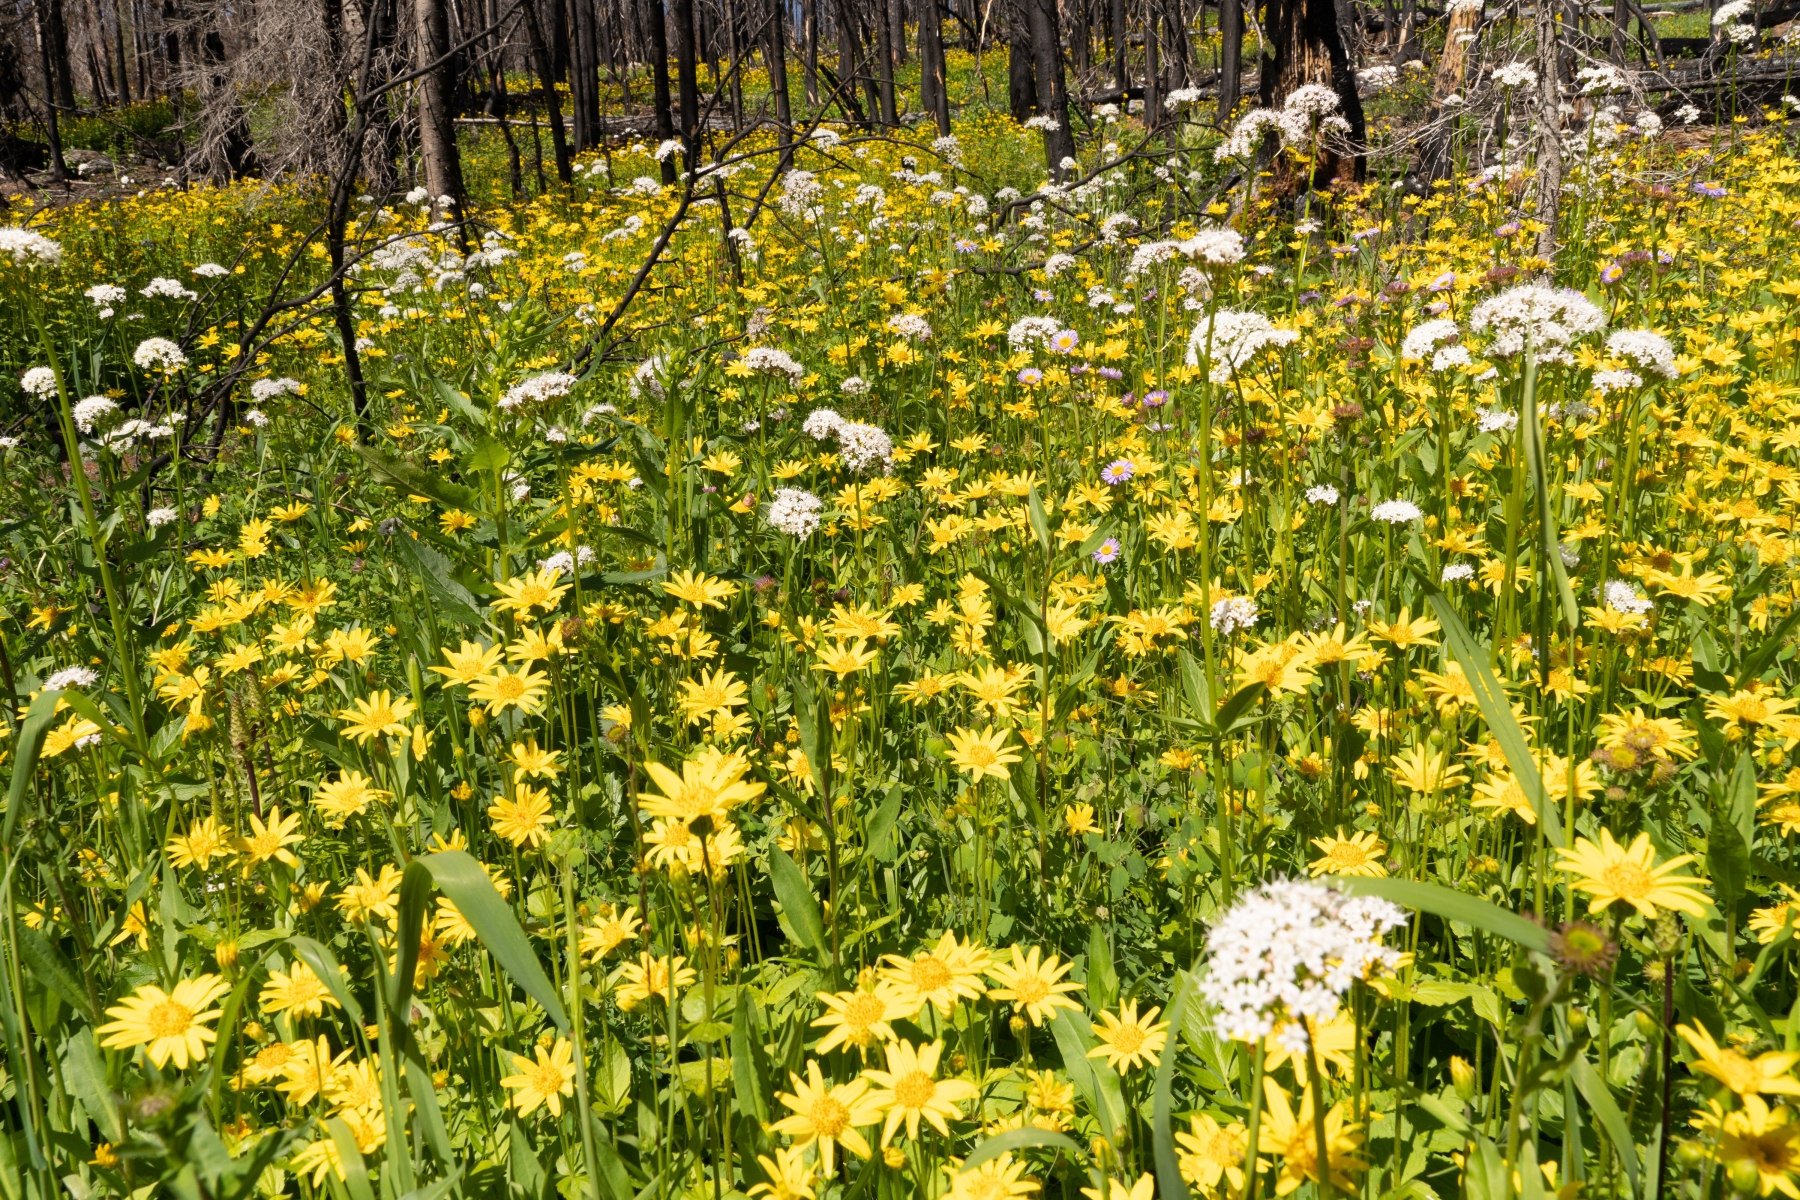
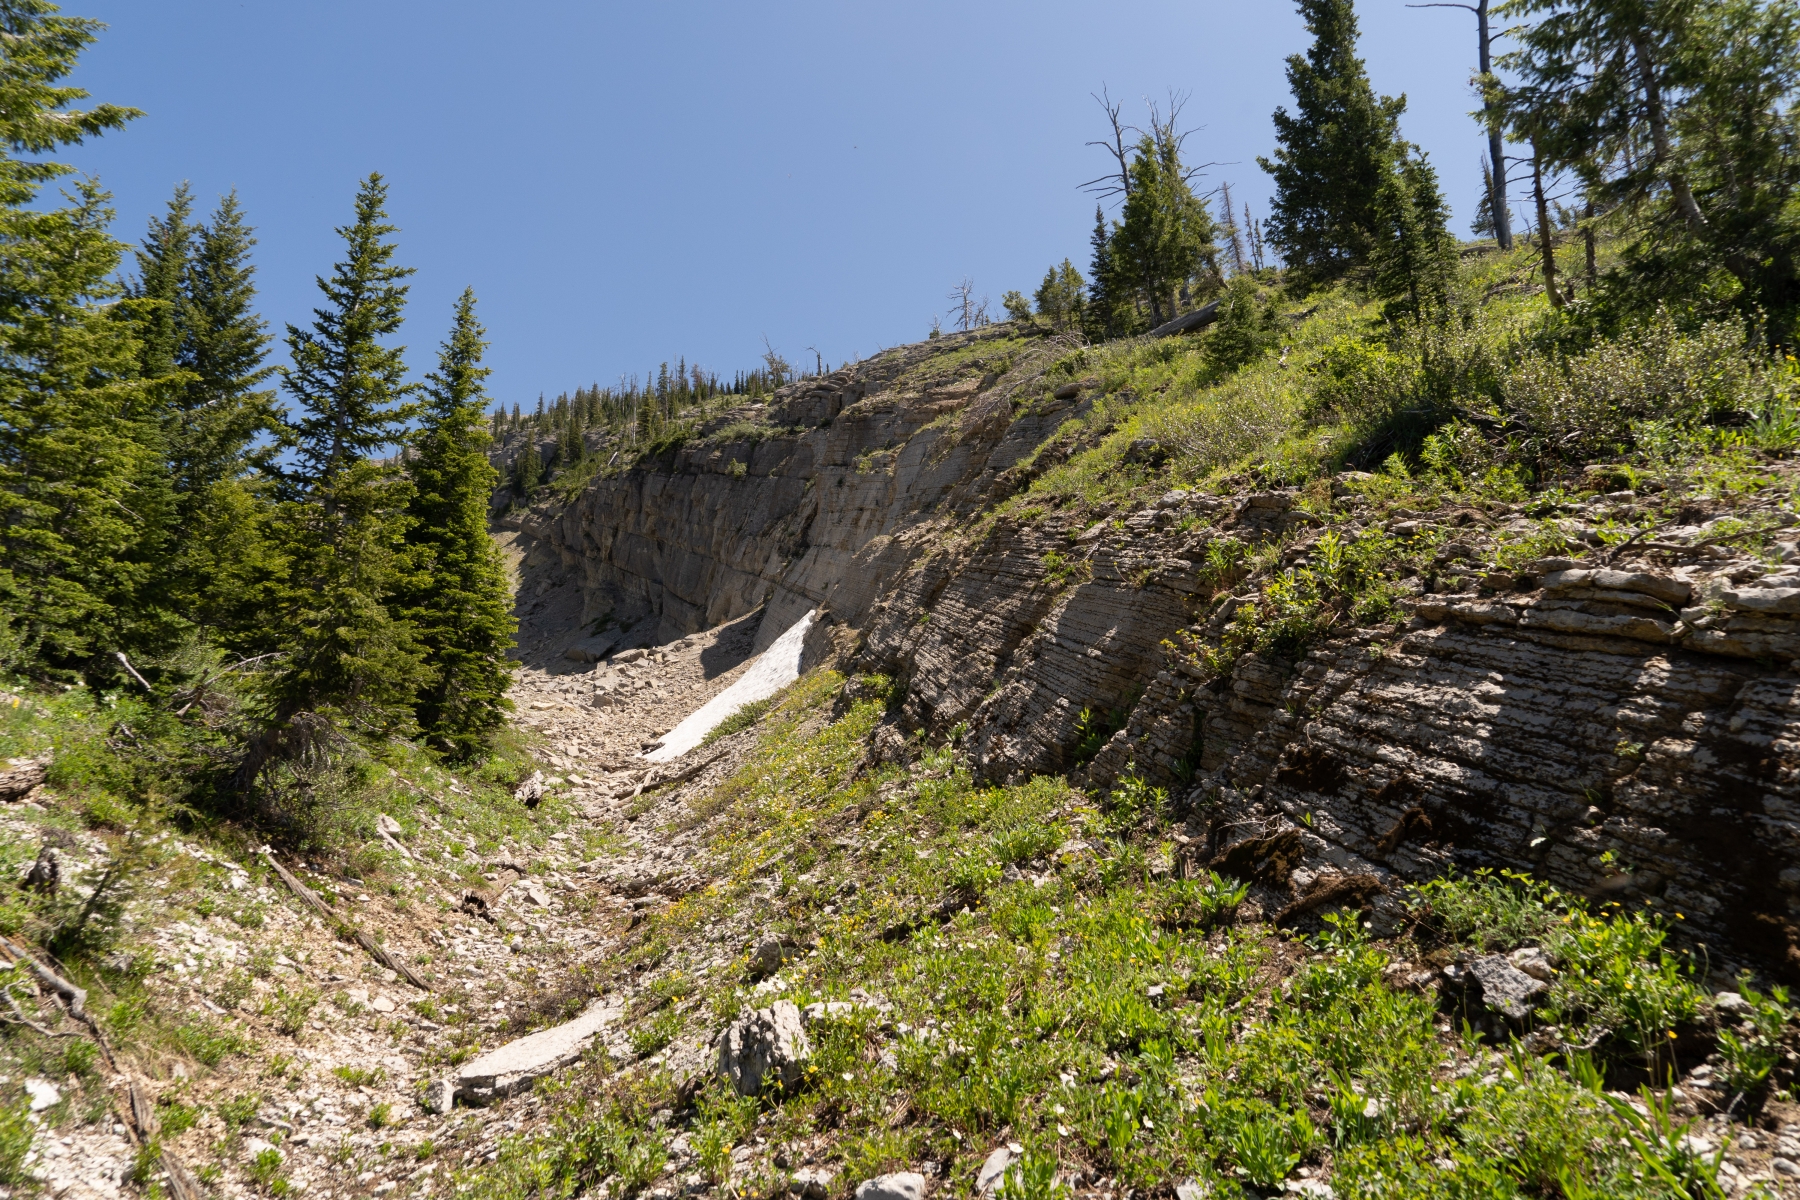
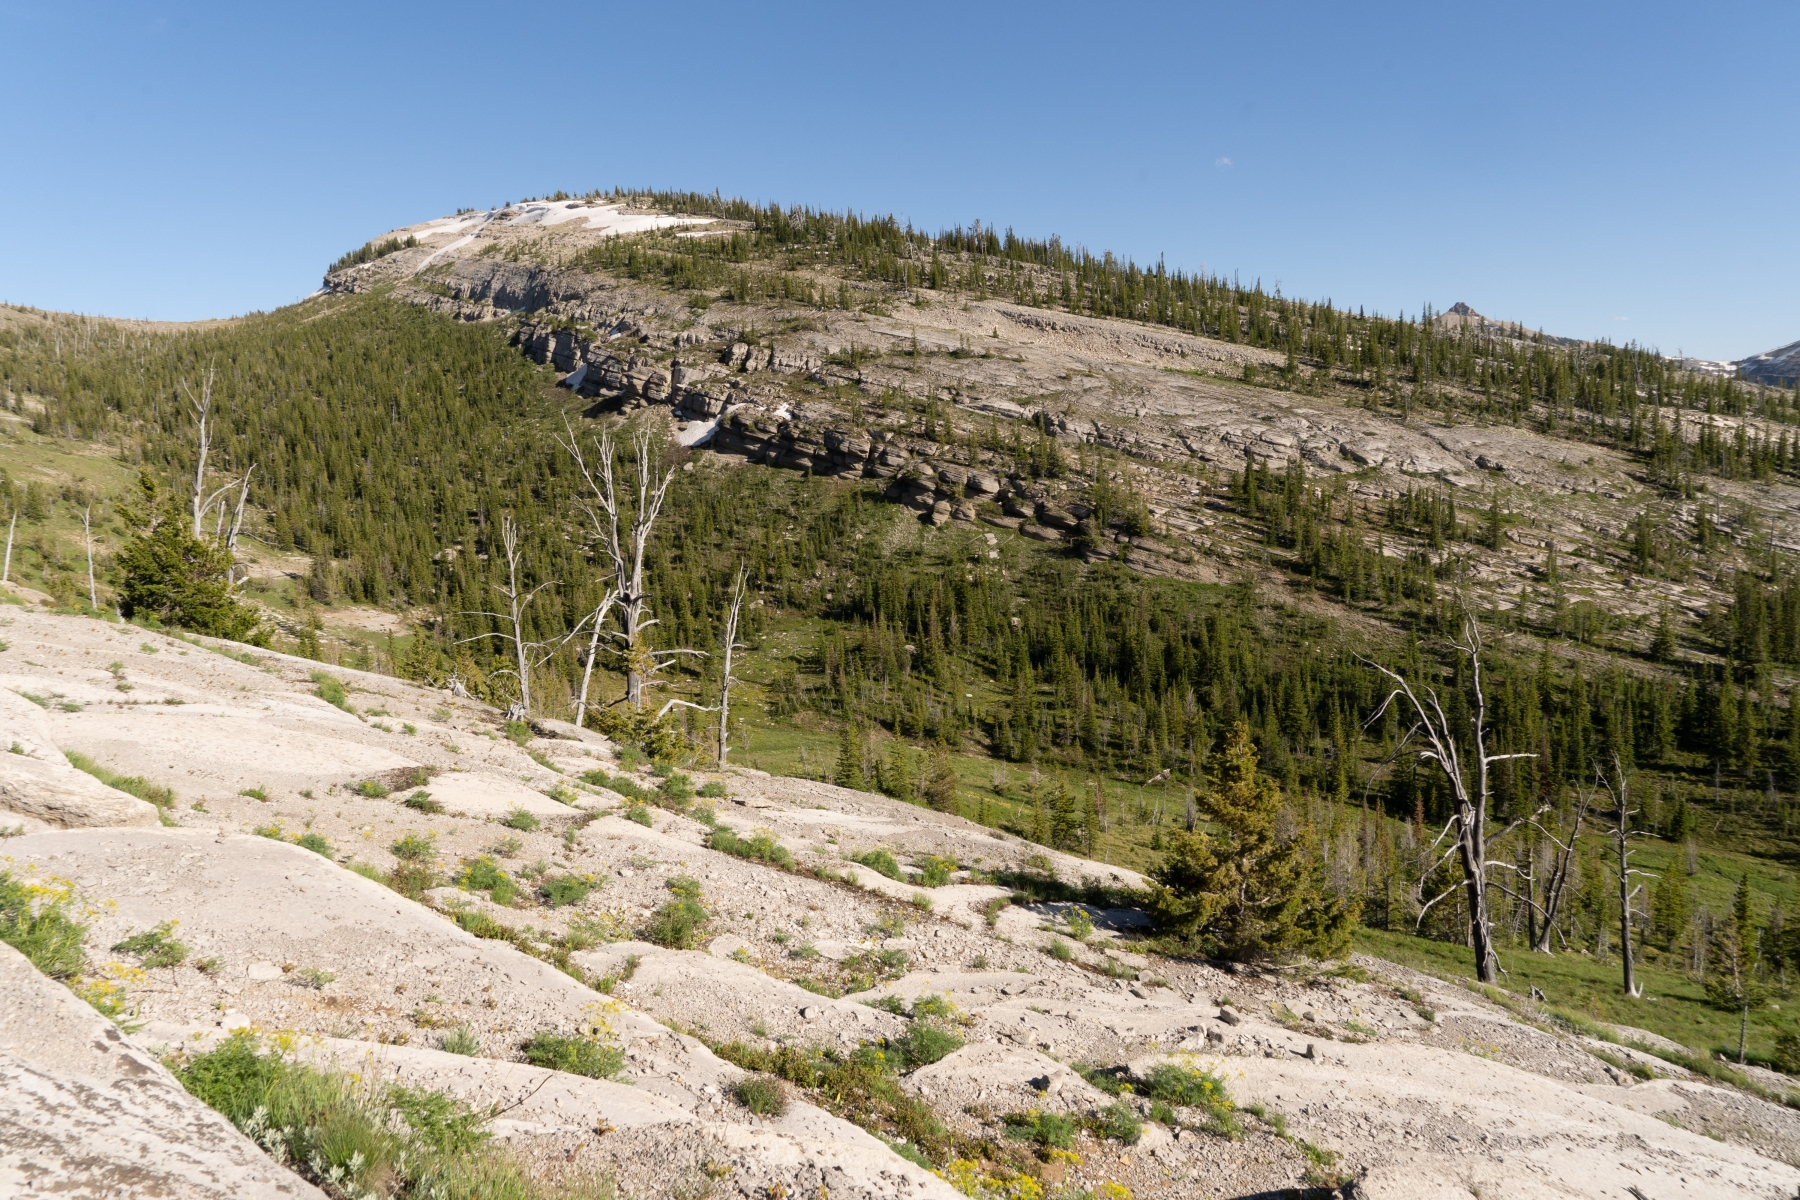
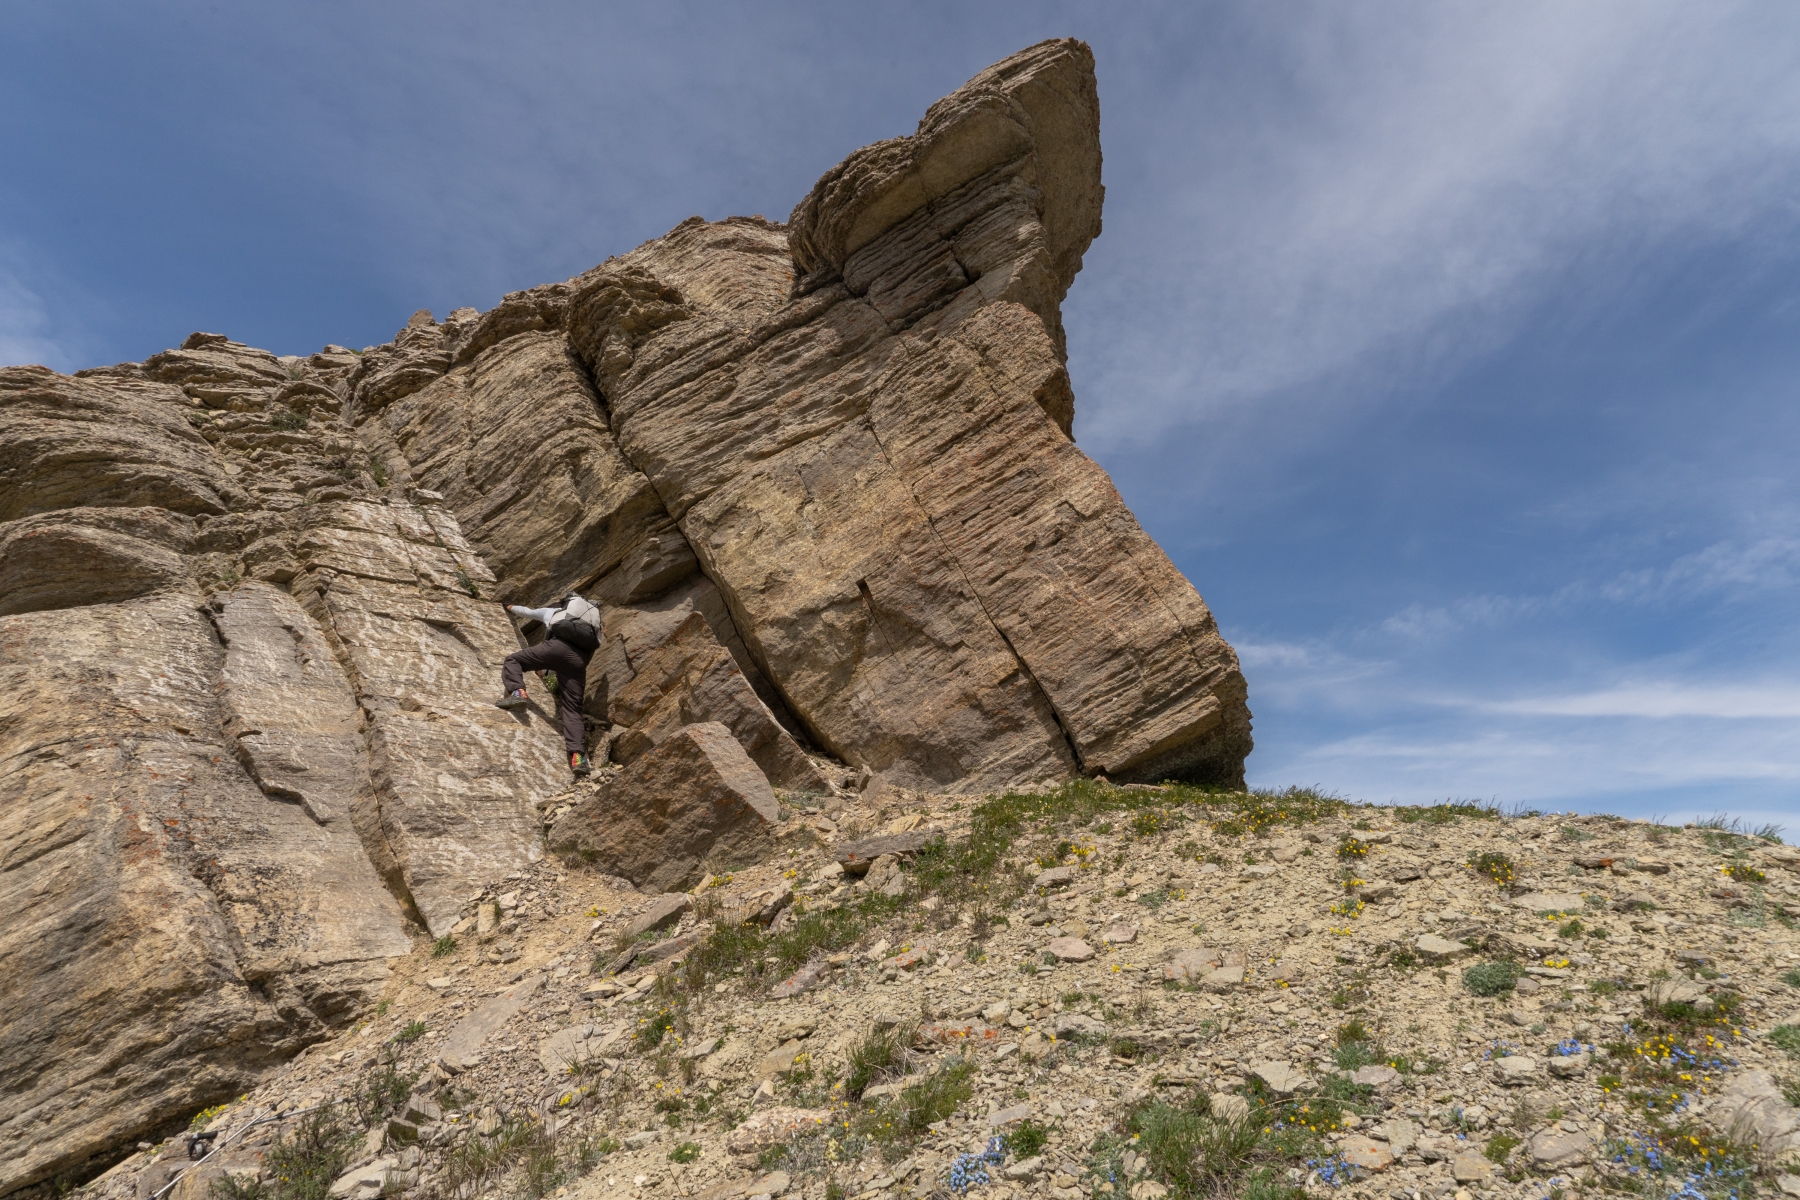
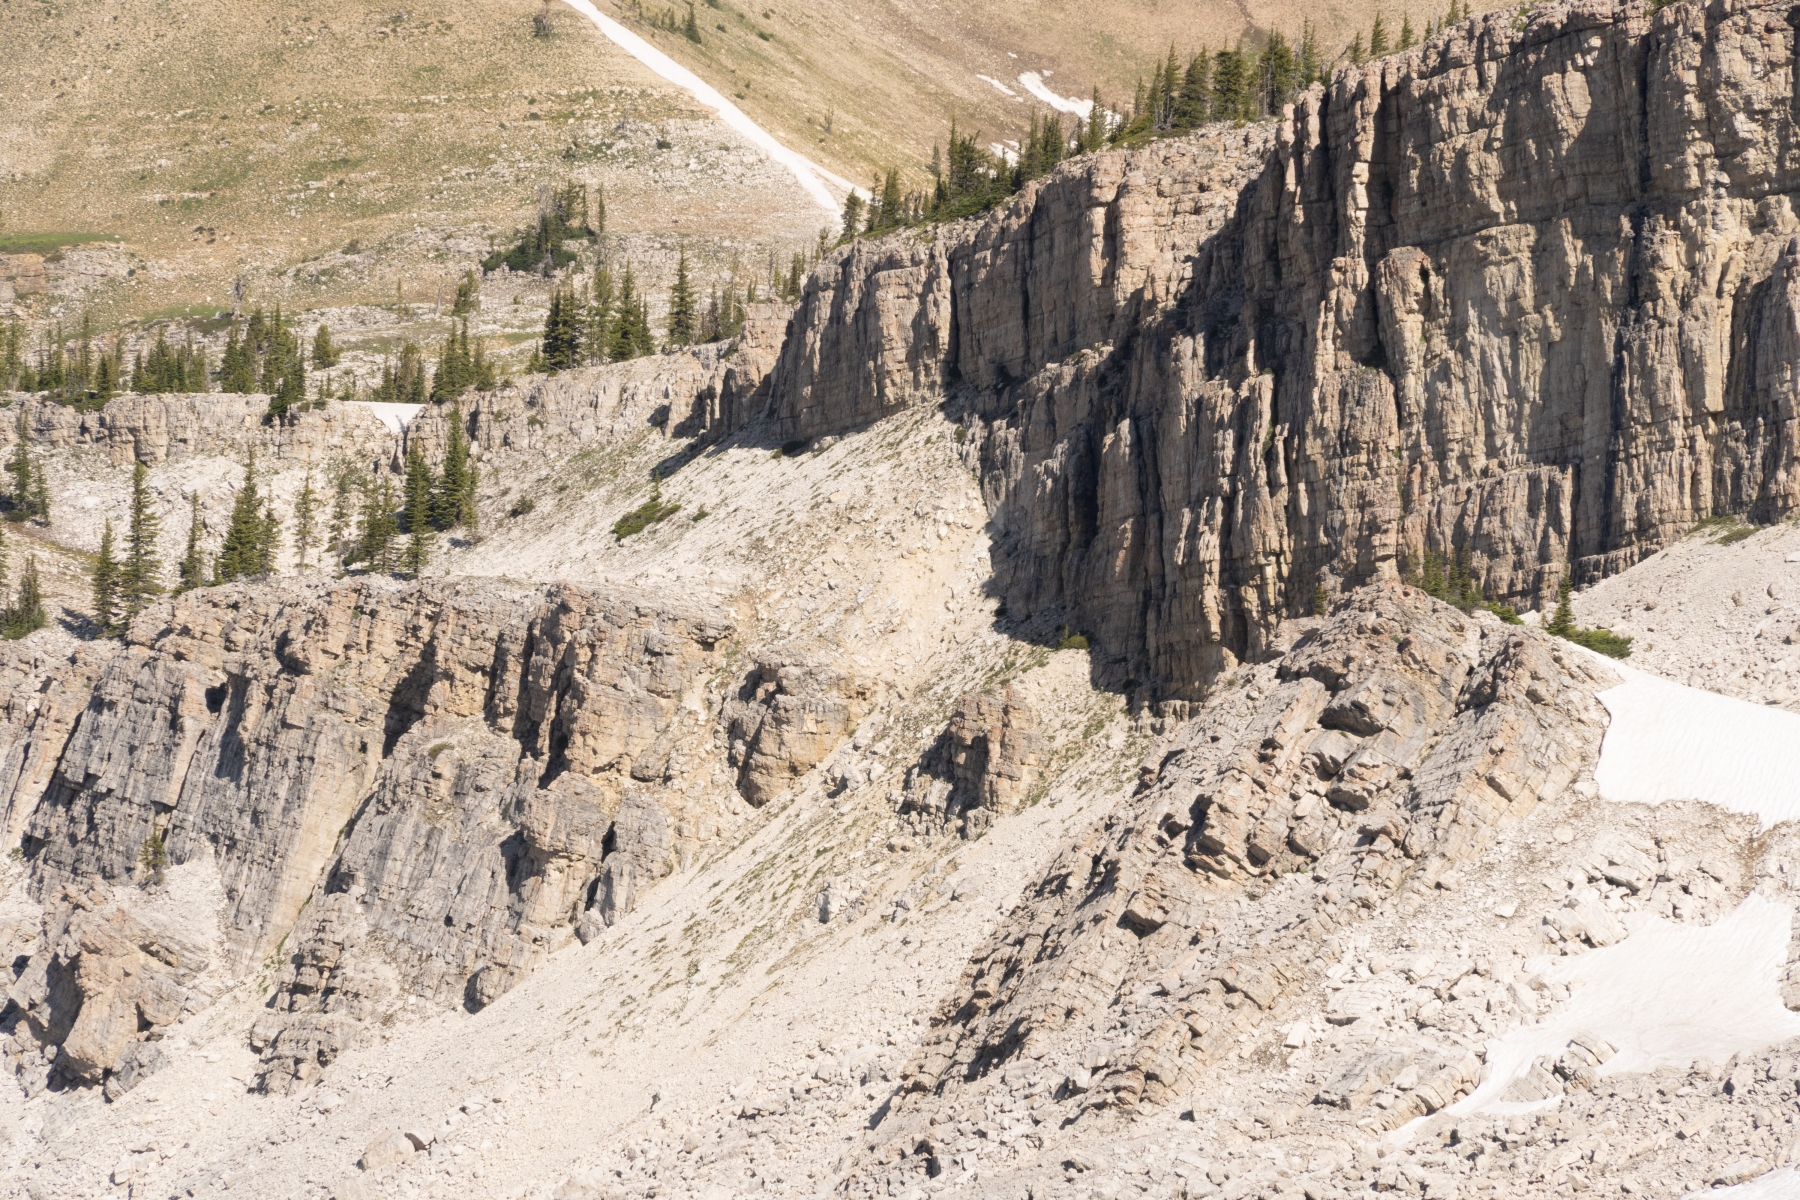
We woke up to see the sunrise from up on the ridge and got going. Continue on Trail 243 south, gradually descending off the ridge. Around the 6,800-foot contour, Trail 243 turns into Trail 90. Trail 90 also continues to the west. Stay on the same trail going southwest! There's a fresh burn area, tons of wildflowers, and the trail is easy to follow. Cross Juliet Creek to find the junction with Trail 112. Trail 90 technically ends here, and both trails in the fork are Trail 112. Take the left, southeast fork for only about half a mile. Around the 6,500 foot contour, leave the trail and head south into the burn area. It won't be very glamorous bushwhacking for the next hour, but it will get you on the approach to climbing the back of the Chinese Wall. Pick your way through the burn area, and cross the creek. You might run into a small cliff or at least a very steep hill. If it is too steep to climb, follow it west until it becomes climbable. Once you have overcome that obstacle, head uphill in a southeast direction, and the trees should recede eventually. You'll be on a big grassy hillside, following the tree line uphill. Be careful not to go too far uphill because there are some more cliffs that you'll want to bypass by going west and downhill of them. The southernmost cliff you have to bypass tops out at a peak that's at 8,103-feet. Stay west of that cliff, then once you have gotten around, go straight uphill to the rim of the Chinese Wall.
Once on top of the Wall, all the hard work is behind you for this area. Enjoy the view! Hike along the rim of the Wall for the next 4 miles. Just after Salt Mountain, there's another cliff obstacle to navigate around. The rim of the Chinese Wall dips sharply, and you'll probably want to head west downhill to navigate around it. Go downhill until you see a reasonable way turn and go southbound again. Before you descend, take a mental picture of the cliffs opposite of you just below the cliff mountain. You'll have to find a way up through those cliffs on the other side too. Once you find a way down from the Salt Mountain cliffs, hold your elevation, which should be low enough to bypass the Cliff Mountain cliffs too. Make sure to fill up on water at the creeks in this dip, it could be at least 4 miles until the next water source. If you're hiking later in the year, it could be as much as 9 miles. All the water sources on top of the Wall aren't very reliable. After filling up, we found a nice place to camp in one of the few flat areas south of Cliff Mountain.
Day 5 - 15 miles
Summary: Another awesome day hiking along the top of the Chinese Wall. There are a couple of cliffs to contend with again too.
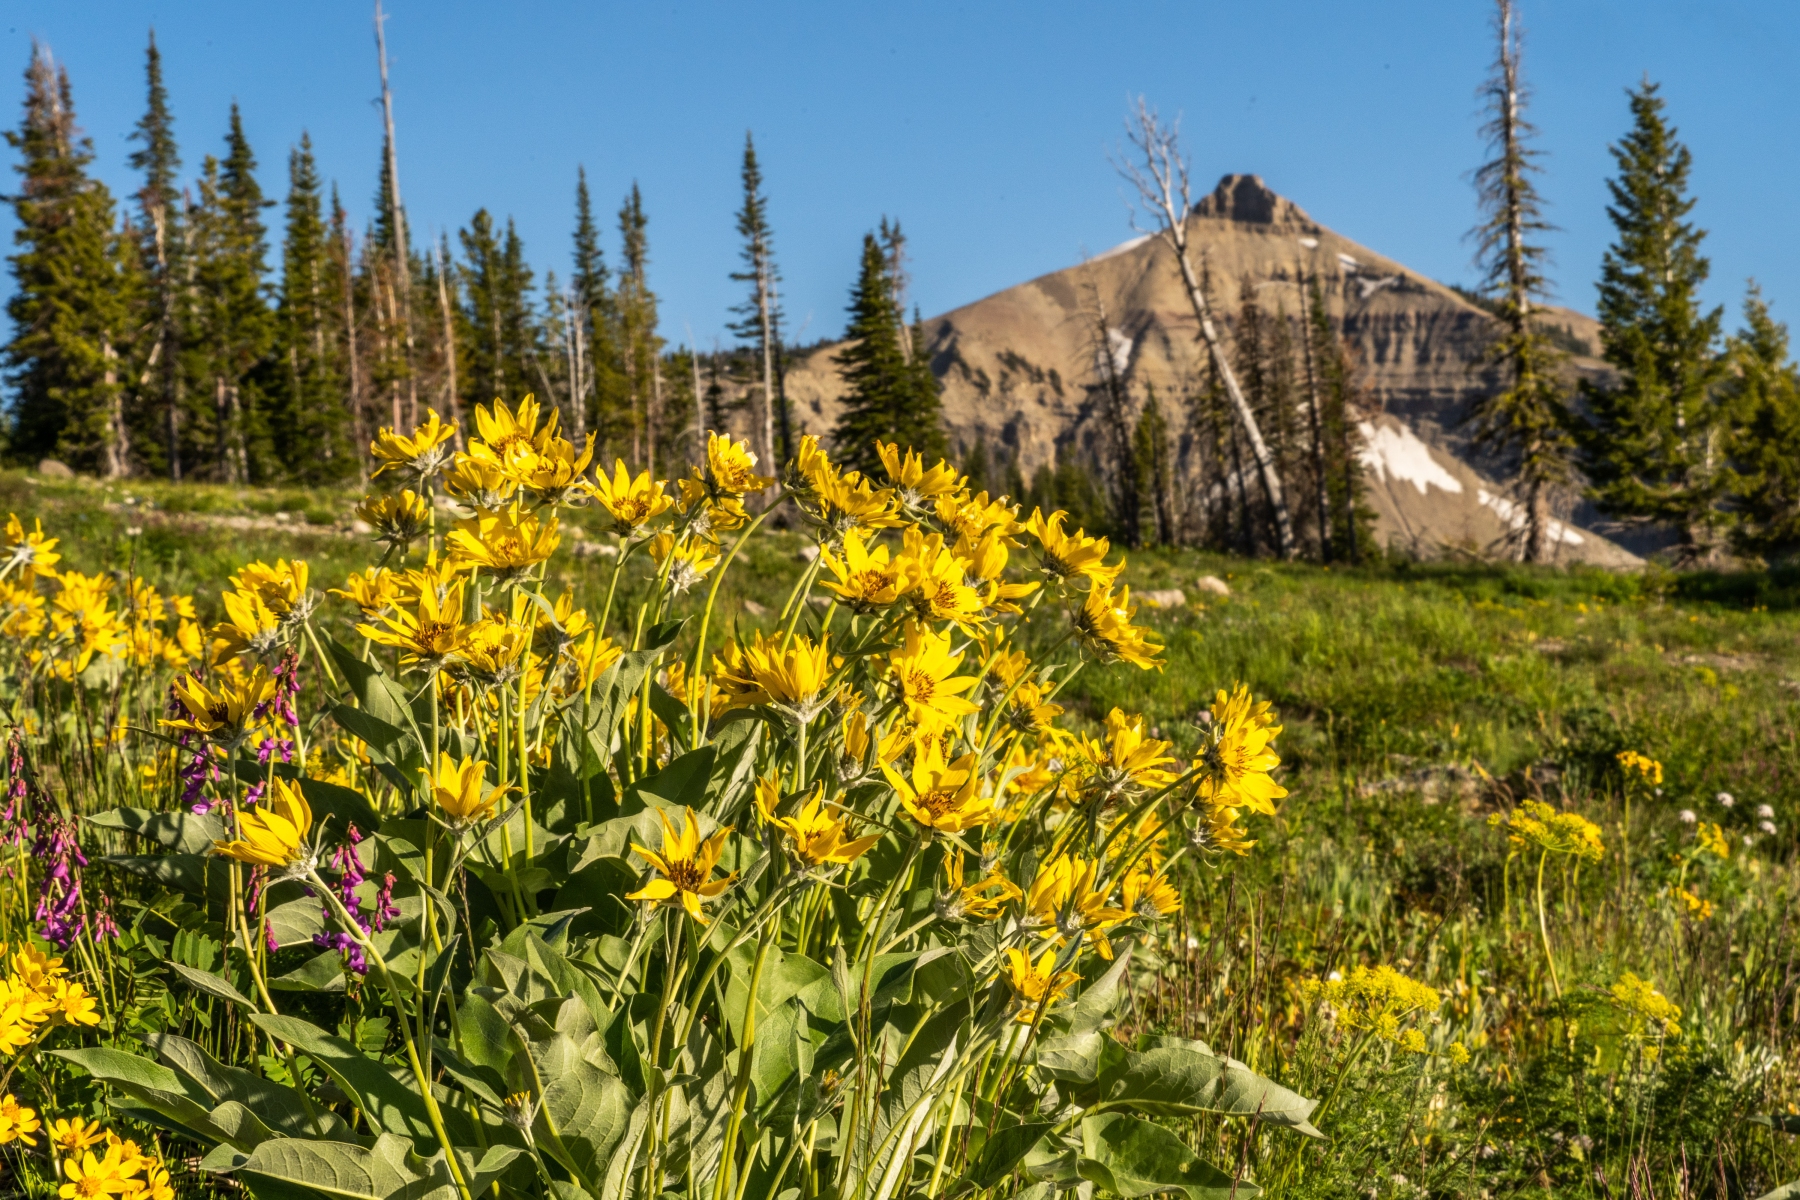
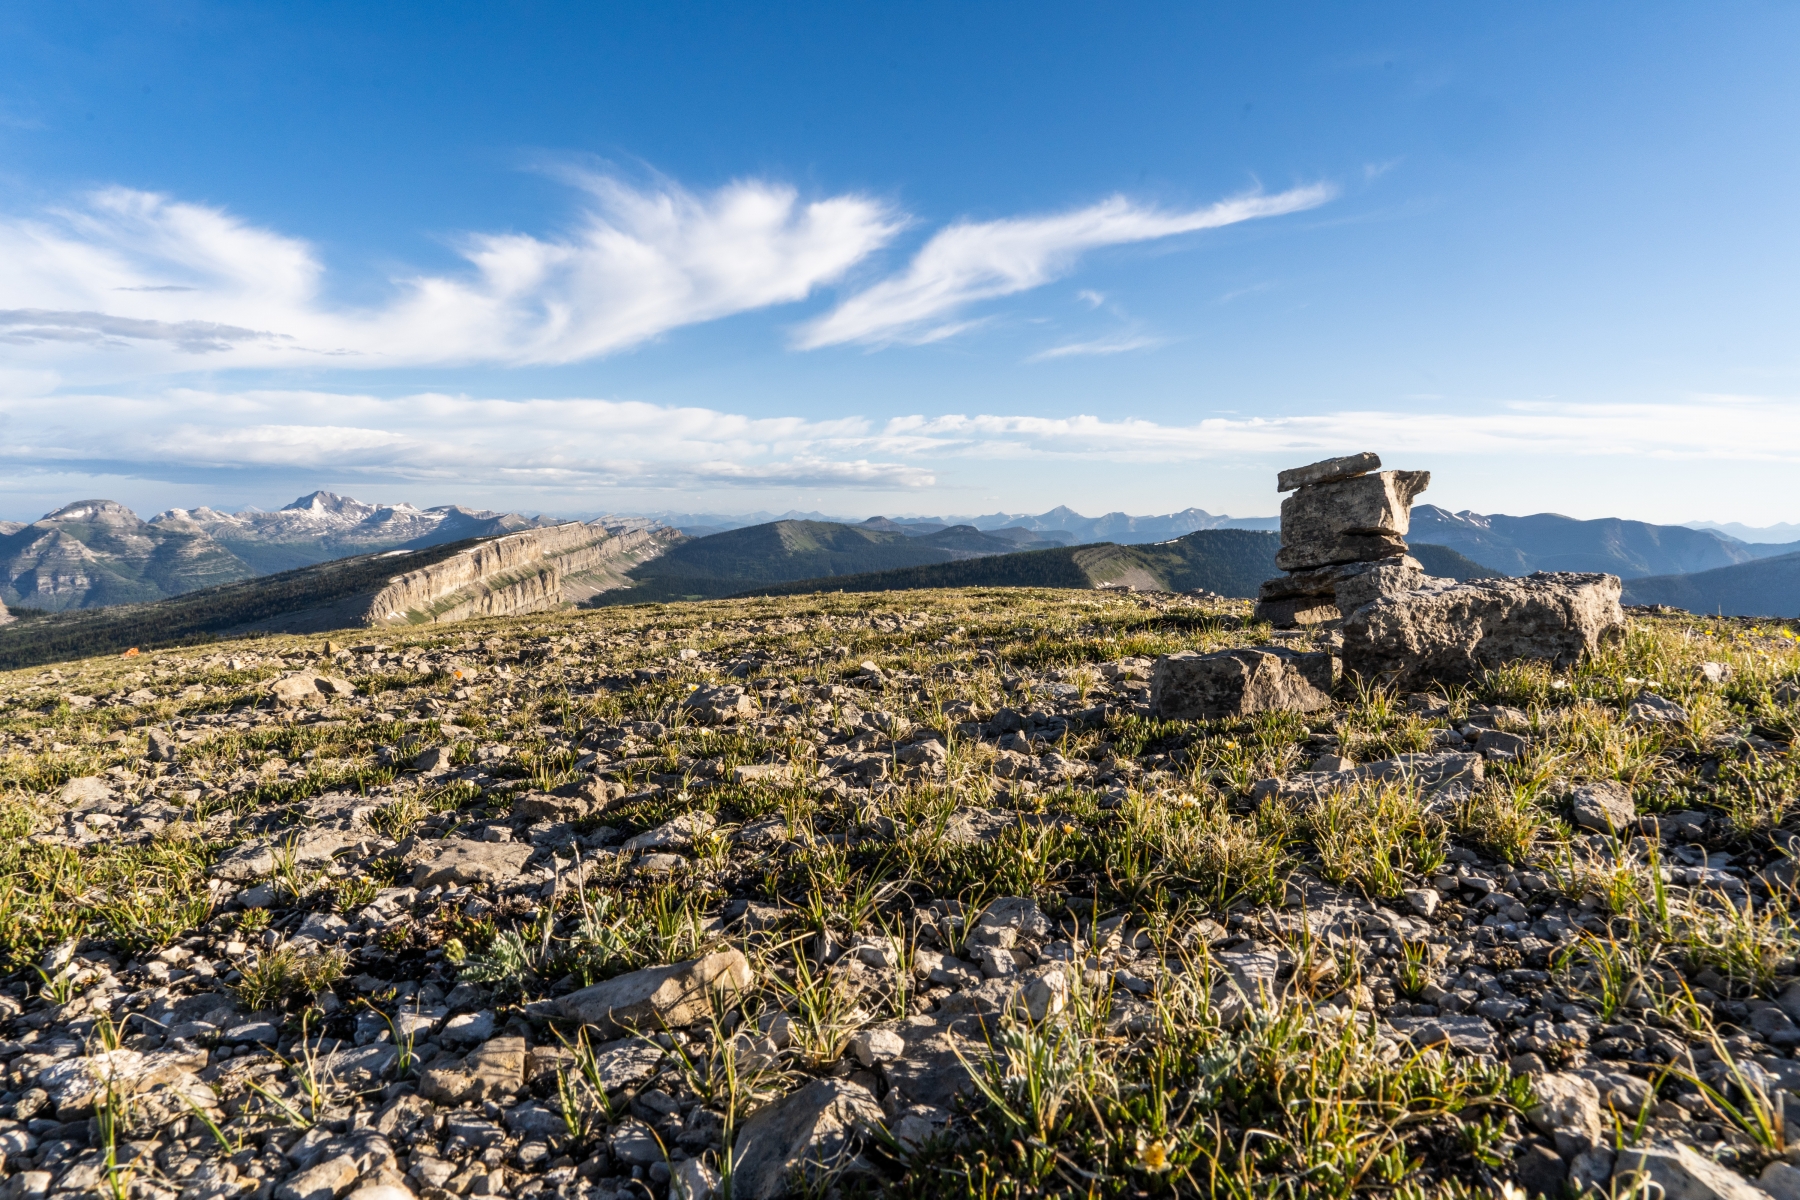
The summit of Cliff Mountain offers one of the best views of the whole top of the Chinese Wall. Not only do you see the Wall in both directions, but much of the rest of the Bob Marshall Wilderness is visible too. A secondary wall rises up out of the Chinese Wall, known as Sphinx Peak. You will continue in-between the Sphinx peak and the rim of the Wall. You may find some snowmelt here at the southern end of the Sphinx if you need water.
If you are feeling adventurous, you can summit the Sphinx too. Head to the southern end of the mountain and wrap around it to the west a little bit until you can find a way to get above the cliff. From there, you should be able to gain the ridge and follow it up to the peak. To keep going on our route, continue along the rim of the Wall to Haystack Mountain. Around there, you'll be able to pick up a trail that switchbacks up the hill from below. After Haystack Mountain, there will be another cliff to deal with. We were able to climb down it directly without having to go downhill very far. There was even a small cairn marking a way down the cliff. It was a class 3 scramble, though, so if you're not comfortable climbing with your hands and feet, you can go downhill farther until the cliff recedes into the hill. After that, it was pretty straightforward for the rest of the top of the Chinese Wall. Follow the ridge all the way down to the White River Pass.
Now you're on Trail 211, and it's smooth sailing all the way back to the Benchmark Trailhead. It's a long downhill back to the Continental Divide Trail, also known as the Wall Trail. Then it should look familiar as you are going back out the way you came in. This trail is busy, and although there are a lot of nice campsites, it may be hard to find an unoccupied one.


Day 6: 7 miles
Summary: Easy stroll back to the car compared to what you've just done.
That last day is an easy, 7-mile stroll back to the car at the Benchmark Trailhead. You've already seen this whole section of the trail. You'll likely be thinking about a greasy cheeseburger by now.
Testimonials and Updates
Written by: Nabeel Al-Shamma August 8th, 2023,
We set out from Benchmark on July 20. Good hiking weather the first two days. We tended to stop in the early afternoon as my friend dislikes hiking in the heat. On day 3 we came to the Wall. So glad you mentioned the side trail above Burnt Creek just before the Wall. Hiking under the wall was magical. Great views of the wall with pleasant meadows and woods. We spotted several pika and a young marmot at our lunch break. At the end of the day we went over Larch Hill Pass and down to Juliet Creek to shorten the route. It was very toasty that day, around 90-95 in the afternoon. We camped at Juliet Creek, a beautiful spot. Looking at the bushwhack and contemplating hiking along the rim with little water in heat we changed plans. Instead we took the very long White River Trail, which felt more uphill than downhill. A highlight was finding wolf scat in the trail and hearing a wolf, maybe two, howling in the mid-morning. When we got to camp around 3 pm it was again in the 90's. And fire smoke, probably the Seely Fire. Ouch. A lot of time soaking feet in the creek. We set off early the next day as we had about 3000 ft vertical to get to White River Pass. It was 60F when we woke up at 5 am. But very pleasant at the pass. I solo hiked about a mile along the ridge towards Haystack Mtn to get a last look at the wall. After lunch we had a long hike down to Burnt Creek. We had thought there might be a camp in the Indian Creek drainage but no luck. The camp at Burnt Creek was great. We had our first raindrops and thunder of the trip that evening and morning. Last day we booked the rest of the way to Benchmark. We celebrated with burgers and beer in Augusta. 6 days, 5 nights overall.
See photos from Nabeel's trip here.
Written by: Bill Murphy on August 15th, 2023,
Two friends and I just hiked on your gpx file. Good walk. Wall was excellent. It was dry from the creek after 'start bushwack' till a long ways later. We found a pond below the Sphynx, but I would advise folks to expect a big dry stretch. We were Aug 6..11. Saw maybe 5 CDT hikers.
Best time to hike
The Bob Marshall wilderness is at a relatively low elevation compared to many mountains in the area. With that being said, there will still be plenty of snow if you go too early in the summer. The best time to avoid the snow would be late-June through mid-September, with the tail ends of that window being a little risky depending on the year. We hiked it in early July and didn't have any problems with the snow. Wildflowers were in full bloom then too!
What to bring
Even in the middle of summer, you can expect temperatures to drop into the 40's or lower at night. During the day, it may reach into the 80's. Average daytime temperatures for our hike in early July were between 50 and 70 degrees. High winds and short, but intense rainstorms are something to be prepared for too. This list is the bare minimum of what you'd want to carry for this hike.
- Clothes
- Backpacking Gear
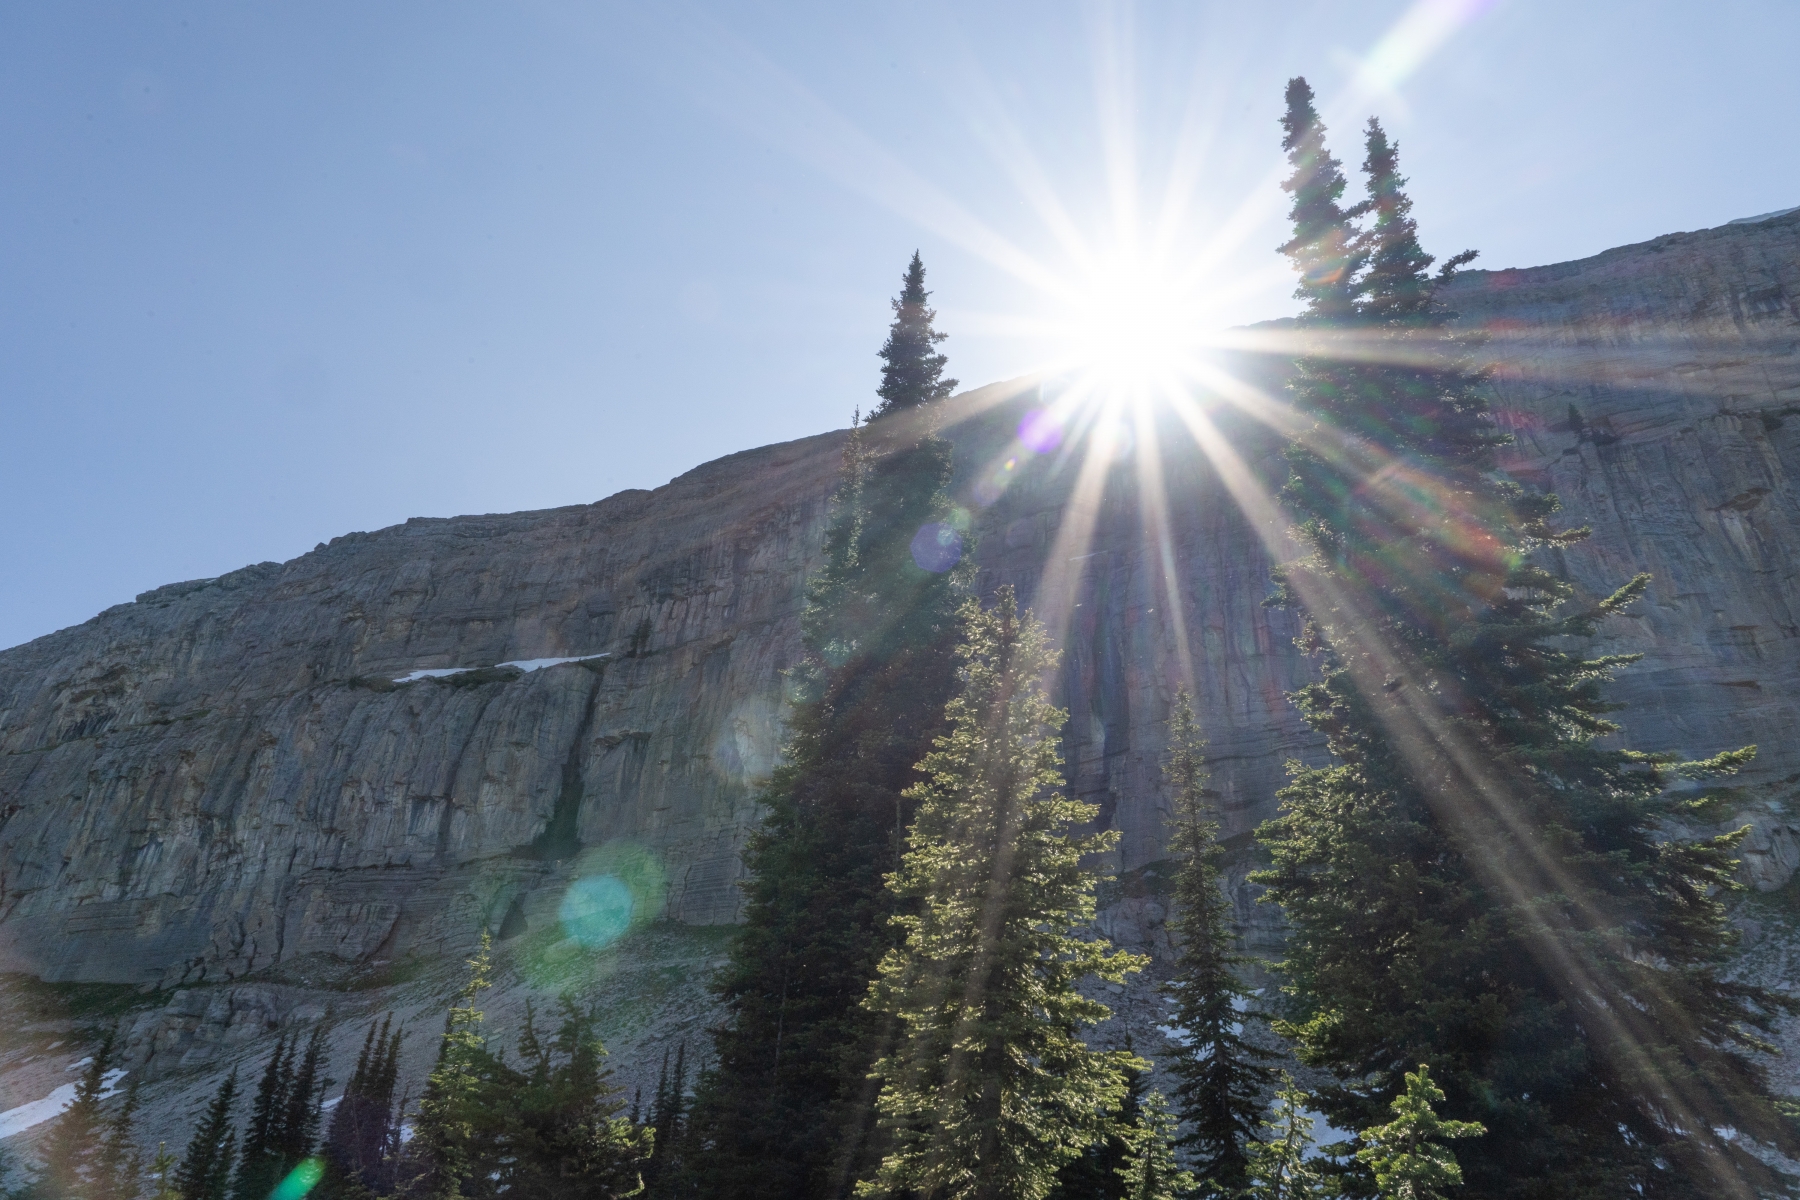
Scenery from the hike